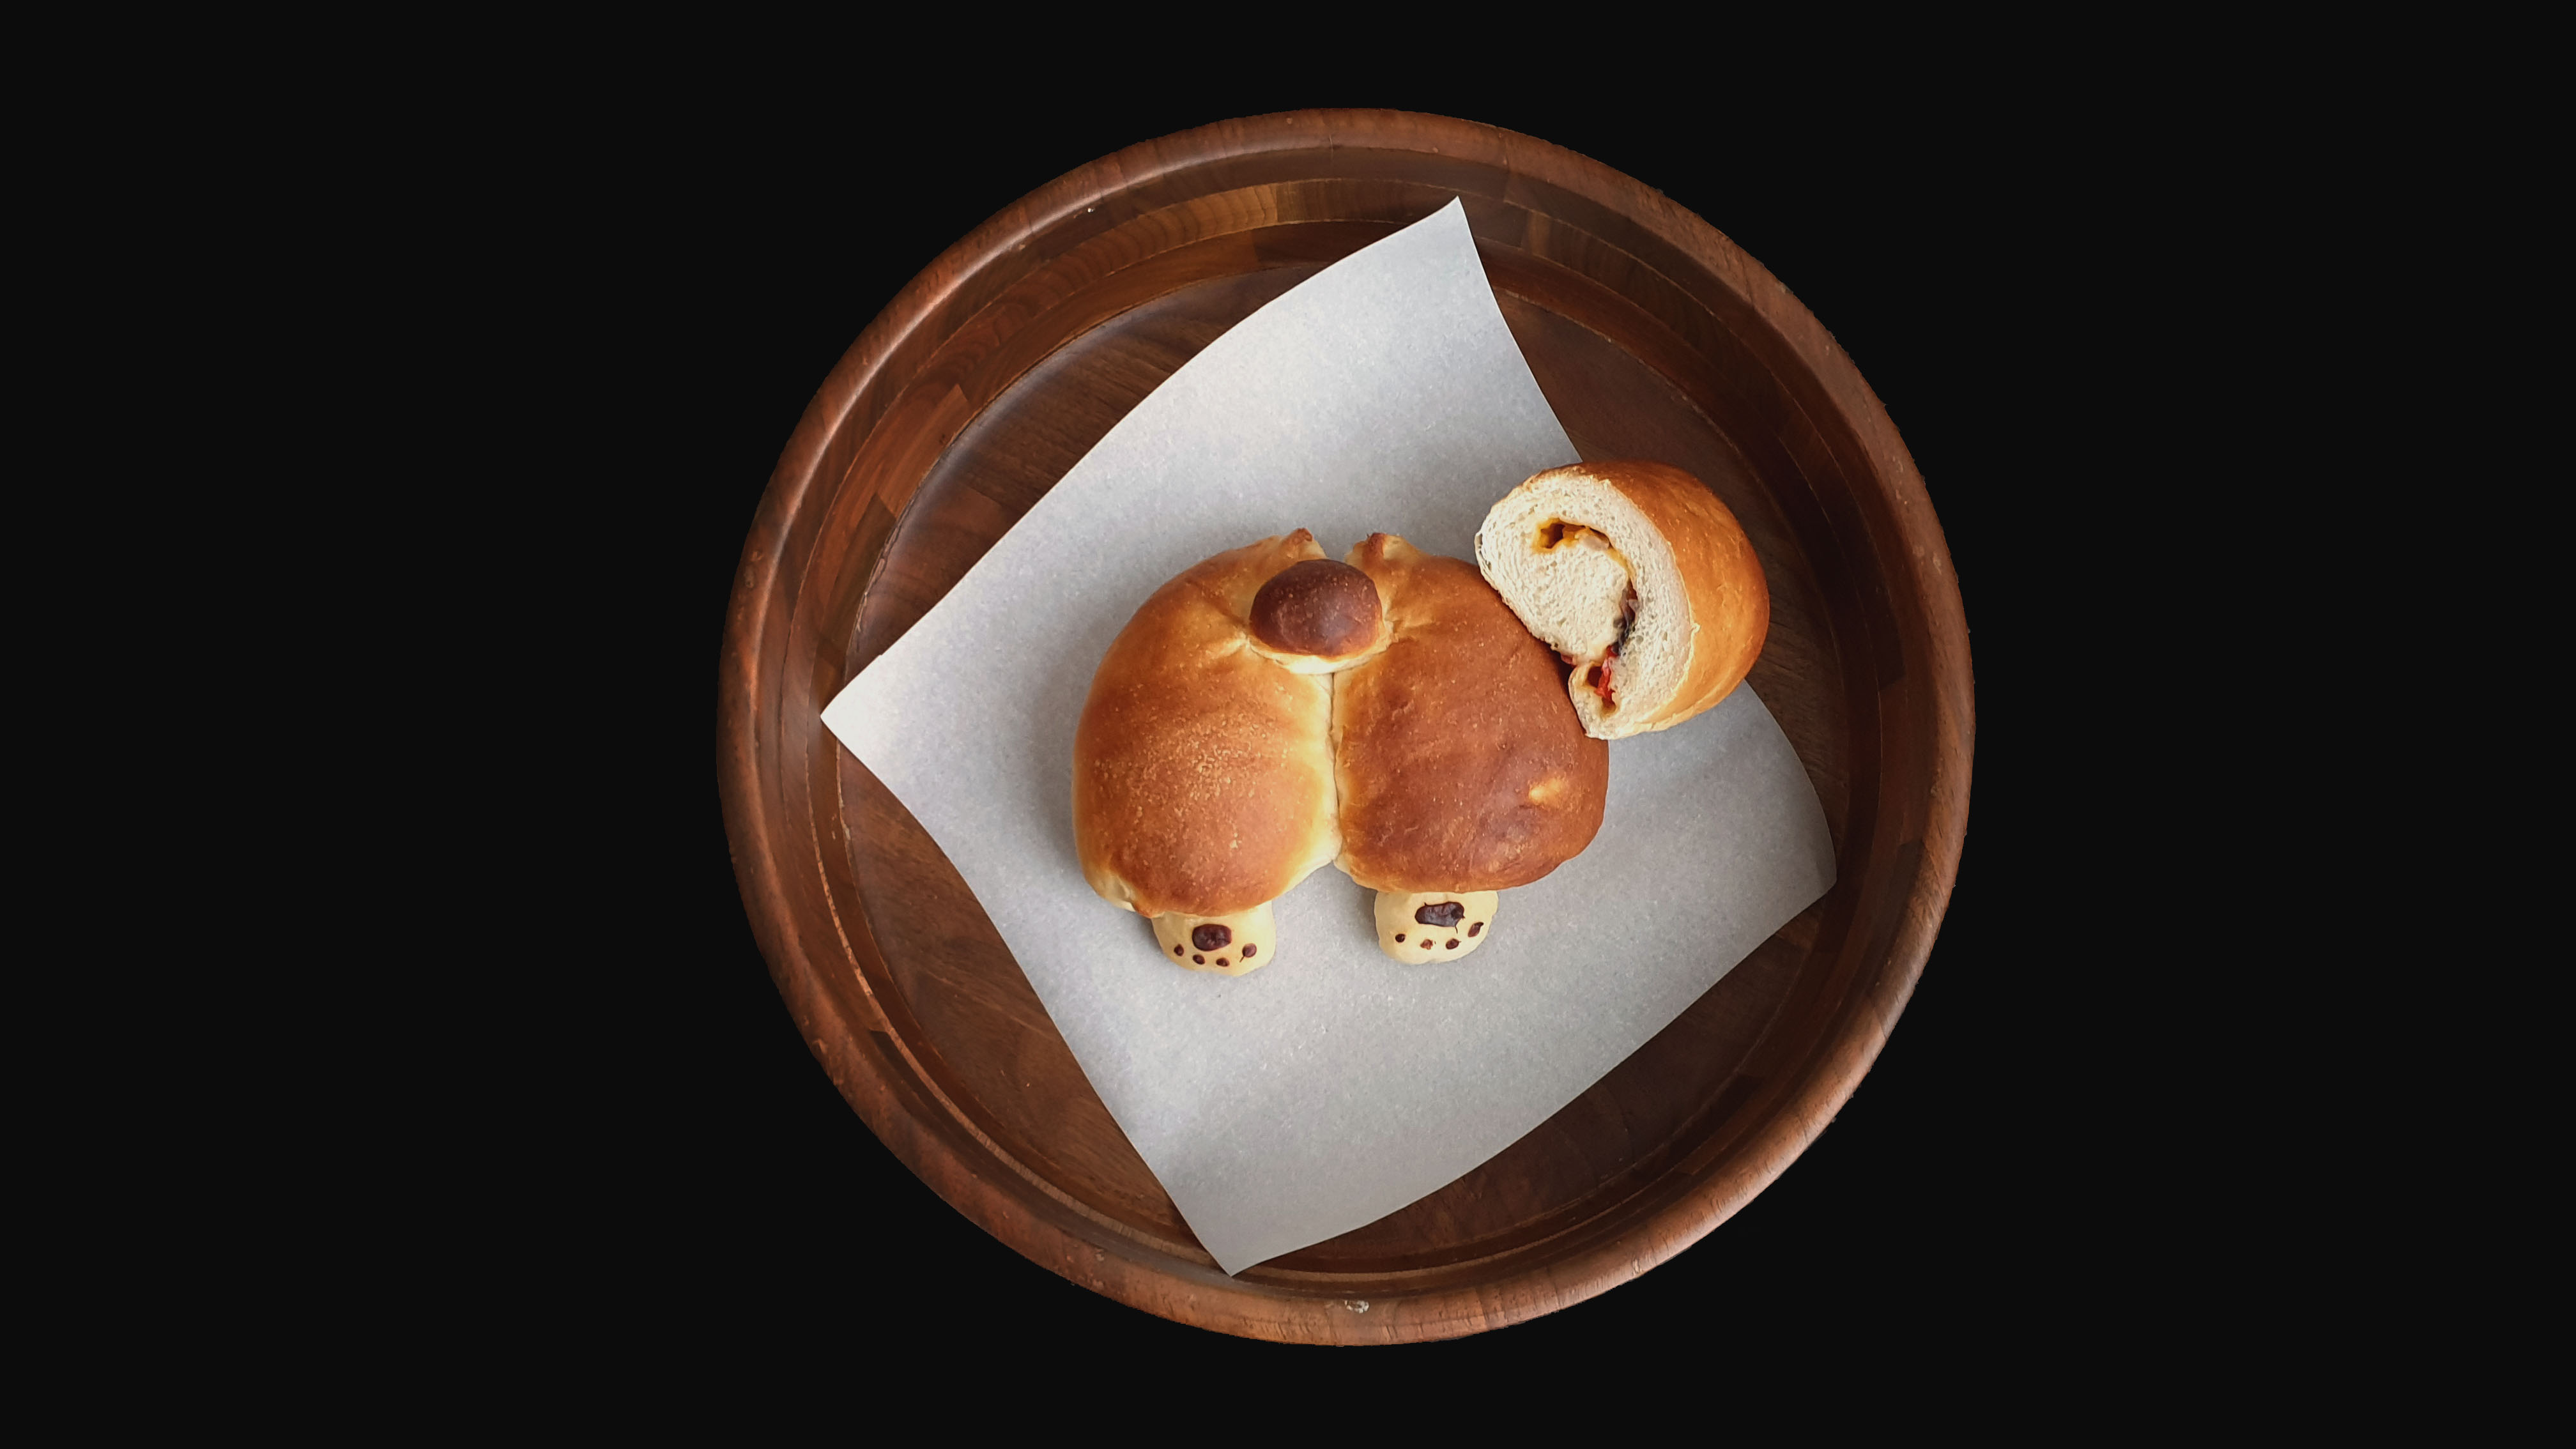
Adorbsssss.

It starts off with my standard hokkaido milk bread base recipe, which is my go-to for an easy-to-handle yet super fluffy bread. Its use of tangzhong, or a water roux, makes for a really soft texture and also helps the bread keep for longer.

Each corgi butt cheek is stuffed with some roasted vegetables, cheese, and garlic powder just so you arent just eating plain (albeit delicious) bread.

Heres a gif that I spent way too long making on the shaping process.

And heres another gif, this time of the butts growing in the oven! (Although one tail shifted over to the butt cheek in the growing process, unfortunately)

Check out the butts VOLUME, she THICC.

I got the idea for this after seeing this image being shared around the internet.
Ingredients (makes 4 generously sized buns)
Tangzhong
- 125gwhitebread flour
- 100gwater
Bread
- 280gfull fatmilk, room temperature
- 5ginstantyeast
- 15ghoney
- 20gsugar
- 410g whitebread flour
- 8gsweetened condensed milk
- 10gsalt
- 40gsoftened unsaltedbutter, room temperature
Filling
- 1 red pepper
- 1 red onion
- Some shredded cheddar cheese/cheese of your choice
- Olive oil
- Salt
- Freshly ground black pepper
- Garlic powder
Decoration
- Some melted dark chocolate
Method
Tangzhong(starter, prepare the night before baking)
- Place the white bread flour in a large bowl.
- Boil some water, and pour 100g of the water into the bowl.
- Mix with a large spoon until well mixed. When cool enough to touch, knead the tangzhong well until all the flour is well incorporated and the dough ball is smooth.
- Wrap the dough well in plastic wrap and refrigerate overnight.
Bread
- In a large bowl, mix together themilk, yeast, honey, sugar, bread flour, sweetened condensed milk, and tangzhong. Knead well until smooth.
- Add the salt. Knead until the salt is well incorporated.
- Add the softened butter and knead until the bread reacheswindowpane stage.
- Cover the dough and let rise until doubled in size, about an hour.
- While the dough is rising, roast the vegetables.
Filling
- Slice up the red pepper and red onion into thin slices, and coat them in some olive oil, salt, and pepper.
- Roast the vegetables in a 390F/200C oven for about 20 minutes or until the vegetables are soft and just start to char.
- Cut the vegetables up to small pieces then set aside to cool.
Bread (continued)
- When the dough has doubled in size,knock downthe dough.
- Re-shape the dough roughly into a round shape, then cover and let rise again, until roughly doubled in size (about 30 mins). Then knock down the dough again.
- Remove some dough to use for shaping the corgi tail and feet. Then divide the remaining dough into 4 (you can do this by weighing the remaining dough and dividing by 4, in case you cant divide the dough by eye accurately like me).
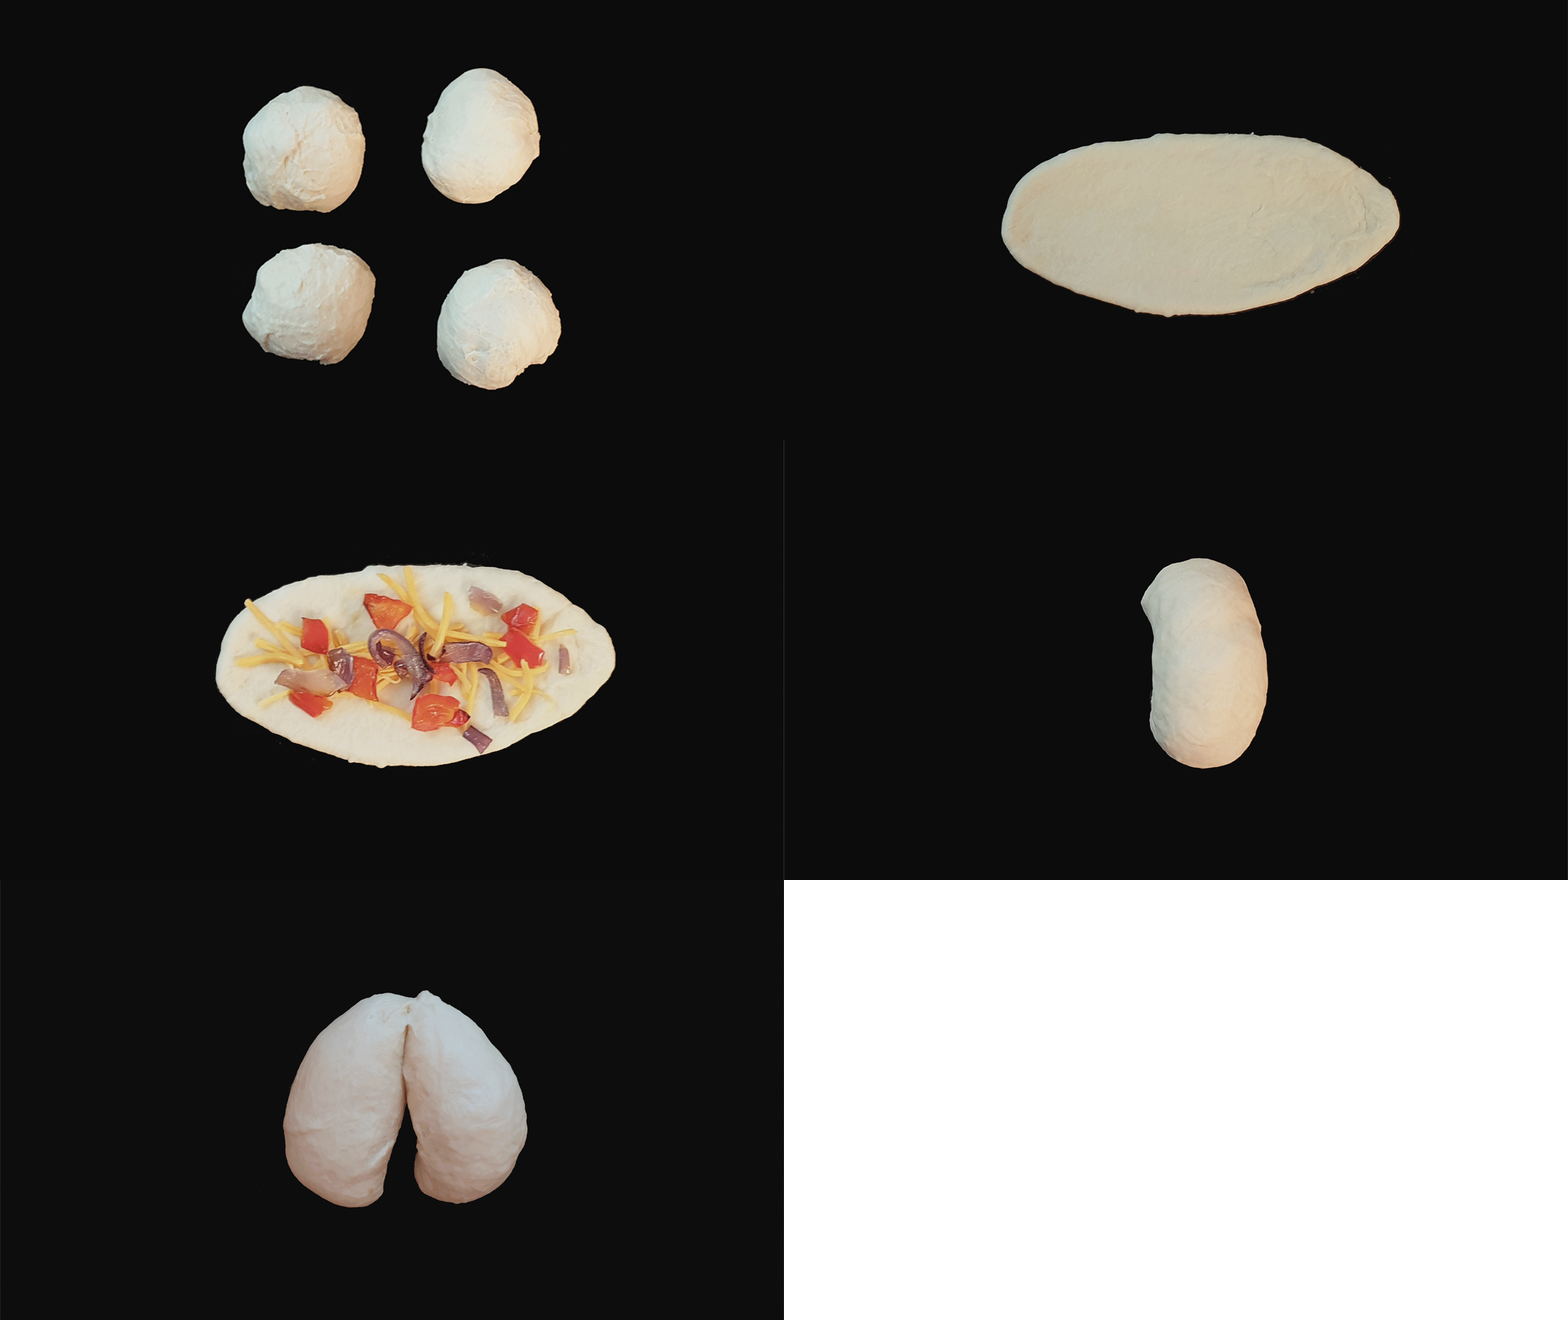
- Split each dough ball into 2 (for each butt cheek). Shape the dough ball by pulling and tucking the dough ball under itself, aiming to create a smooth surface on top of the dough ball.
- Lay the dough ball smooth side down, and roll the dough ball out into a long oval shape. Sprinkle some roasted vegetables, cheese, and garlic powder onto the center of the oval.
- Roll the oval up from the short end. Then pinch the edges of the roll and tuck it under. Try to shape one end to be skinnier than the other end (the skinnier end will the the tail side of the buns).
- Once you have each butt cheek filled and shaped, place them next to each other and pinch the tapered ends together. Take some dough from the dough you set aside earlier to make the tail and feet of the corgi. Aim to get the surface of the tail as smooth as possible, and flatten the feet before tucking them under the butt cheeks.
- Repeat steps 9-12 for the remaining dough balls.
- Cover with clingfilm followed by a damp kitchen towel. Let rise until doubled in size (about 30 minutes). Meanwhile, preheat the oven to 390F/200C.
- When the buns have doubled in size, make any last minute shape adjustments before baking in the preheated oven for about 15-20 minutes, or until the bread is a deep golden colour and sounds slightly hollow when you tap it.
- Let the buns cool on a cooling rack.
- When the buns have cooled completely to room temperature, draw on the paws of the corgi onto the feet using a chopstick dipped into melted dark chocolate.
Notes
- All timings listed are a general guide. Its better to follow the description (eg doubled in size) rather than the timings, as the timing depends on many factors like the activity of your yeast, or the surrounding temperature.
- If youre using active dry yeast instead of instant yeast, you might have to activate the yeast first. Warm up the milk that was supposed to go into the bread till its about body temperature, and then add the yeast into the milk. When the mixture is foamy (about 5-10 mins later), add the yeast-milk back into the bread at the step where the milk is supposed to be added.
- Kneading the butter into the dough after its already been formed helps with the structure of the bread, since butter inhibits gluten formation (apparently).
- Letting the tangzhong sit overnight is technically optional, but it gives a much better flavour if you allow the tangzhong to rest.
- Try to keep the dough damp at all time so if shaping the bread is taking a while for you you can keep the remaining dough under a damp kitchen towel.
