Green chile brisket? Do tell....— Reginald T. Skinner (@regskinner) April 23, 2020
I was going to send him a link to the recipe but was shocked to find I had not posted it before. That is surprising because Green Chile Brisket is a staple at our house. It is tender, savory, juicy, slightly earthy, and has a mild kick. We use it in just about everything.
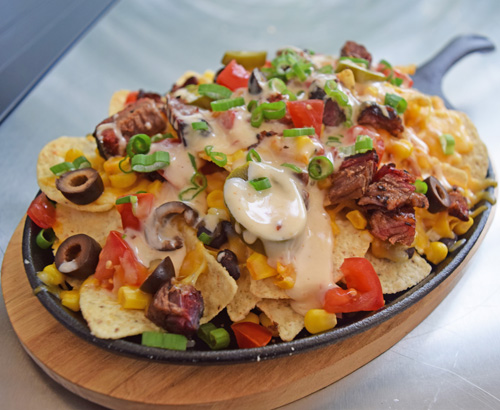
Brisket Nachos (or tacos, fajitas, enchiladas, chimichanga, )
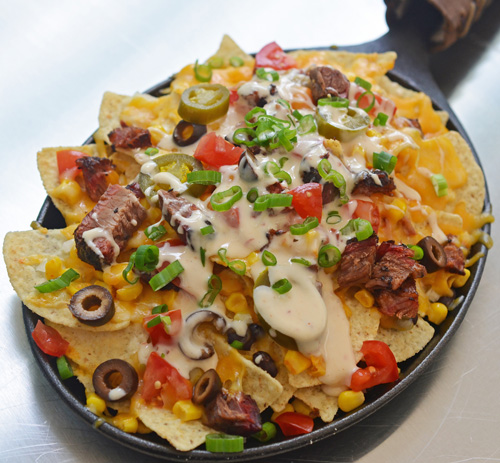 |
| Green chile brisket, fire-roasted corn, diced tomatoes, black olives, green onion, jalapenos, shredded Colby-jack cheese, and our homemade queso. |
Breakfast Tacos
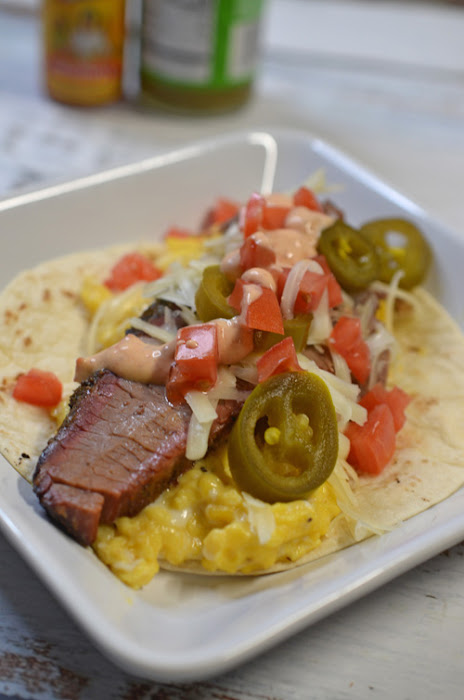 |
| A slice of green chile brisket with creamy scrambled eggs, jalapeno, diced tomato, shredded Monterey-jack cheese, and chipotle crema. It was supposed to be a corn tortilla but flour works. |
Brisket with Pimento Cheese Grits
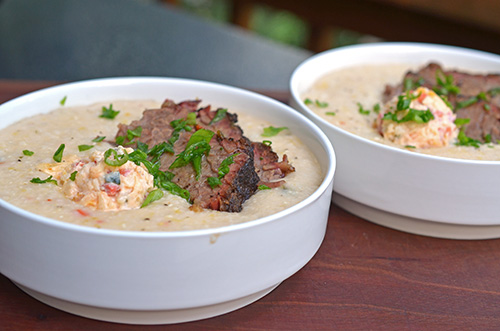 |
| Stone-ground grits loaded with our homemade poblano-pimento cheese and a couple of chunks of green chile brisket. So good it will make your tongue slap your brain out of your head. |
Stuffed Potatoes
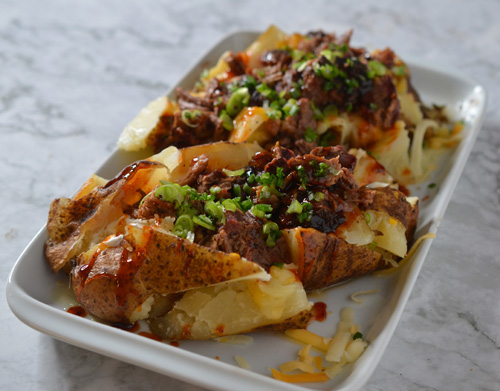 |
| A couple of small baked Russett potatoes stuffed with cheeses, green chile brisket, green onion, butter, and BBQ sauce. |
TL;DR
This is a long post with a LOT of detail. Here’s the “too long, didn’t read” short version. Season the brisket with green chile rub. Smoke it until dark (about 160-170°f internal) and then foil it with chopped green chiles. Braise until tender.
Brisket Selection
Making a good brisket starts with picking the right brisket. Here is what we look for when Alexis or I are picking out a brisket.
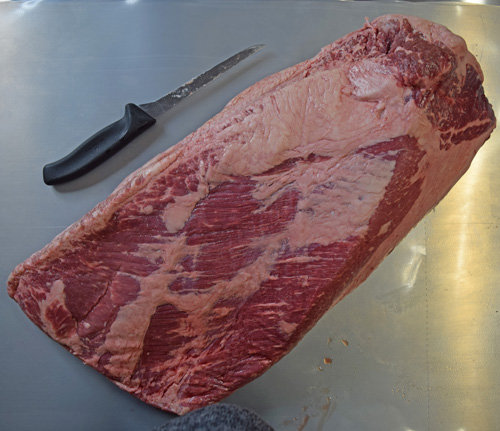 |
| A whole brisket. The "flat" is on top and to the bottom left. The "point" is beneath the flat and to the upper right. |
Size – 17-20-pound whole (aka packer) brisket.
Shape – Even thickness across the flat’s end with an ample flat
Appearance It is hard to tell while vacuum packed, but I look for a deep red color - not too pale/grey and not too dark/purple.
Grade – USDA Prime if I can get it, otherwise I get a Choice brisket.
Brand – I get Certified Angus Beef® Brand whenever I can find one in town, because of their 10 science-based quality standards. Some of the other mail-order brands briskets available are fantastic, but to be honest, I can’t routinely afford $200 for a brisket. Most often, I just take whatever Prime grade brisket Costco has available.
Brisket Preparation
Brisket prep takes about an hour, and I usually do it about 13 hours before I plan to put the brisket on the smoker, to allow for dry brining.
Wet aging – If I am not in a rush for the brisket, I like to wet age the brisket for 30 days from harvest date before using it. Wet aging is simple, no worrying about humidity or airflow. Just put the brisket, still in the vacuum packaging, in the fridge between 27 and 33°f. It will give the enzymes in the meat time to tenderize the brisket.
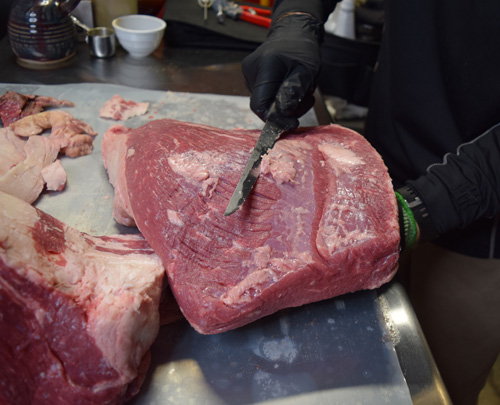
Trimming – I usually separate my whole brisket into the point and flat. David Bouska has a helpful video on how to do this. This shortens cook times, makes sure bigger briskets fit in my large Big Green Egg, and gets more crust on the entire point. You can just leave the brisket whole, but it will take a bit longer to cook.
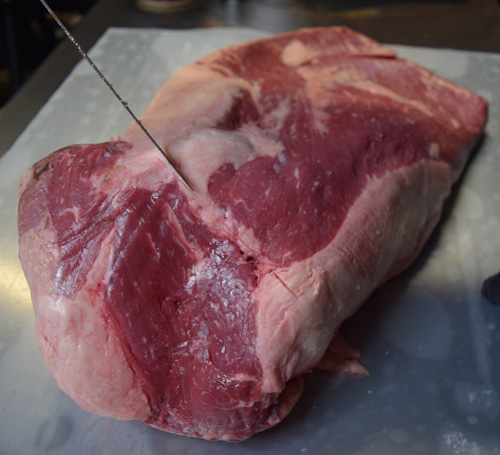 |
| To start separating the point and the flat of a brisket, start at this line of fat towards the tip of the flat. |
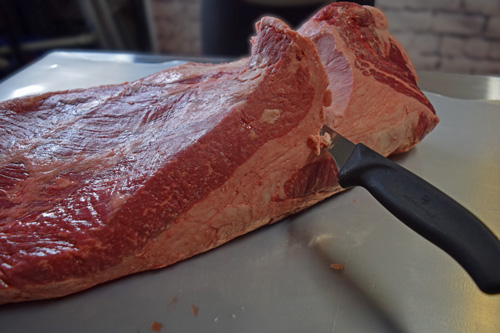 |
| Then follow the line of fat that divides the two pieces. |
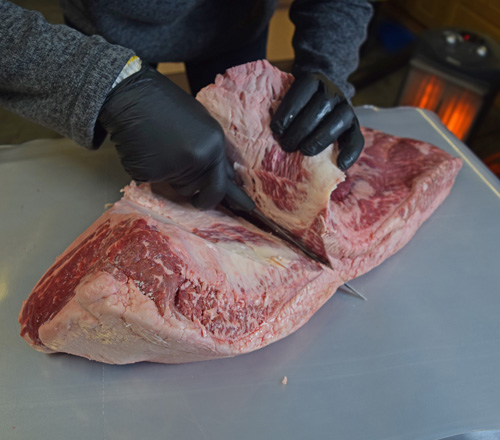 |
| Start pulling back on the flat with your non-cutting hand and cut to about a third of the way back. |
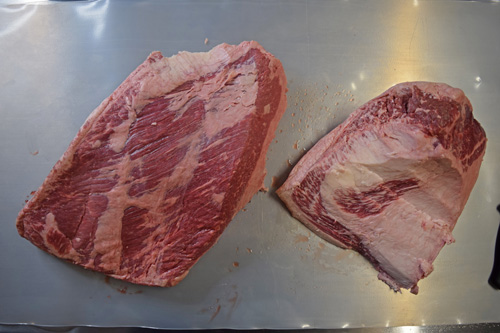 |
| Brisket separated into the flat on the left and the untrimmed point on the right. |
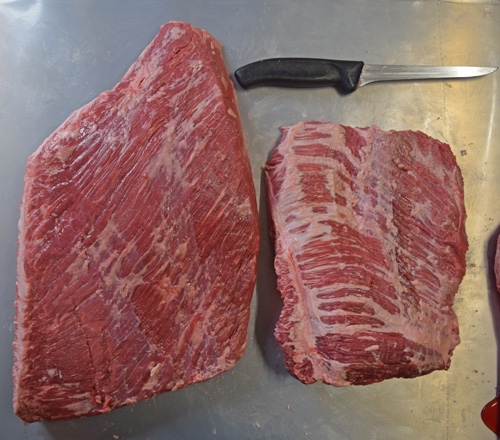 |
| Trimmed flat and point ready for injecting and seasoning. |
Injection – I reduce 3 cups of beef stock down to 1 ½ cups and allow it to cool before injecting it in a 1” grid pattern. I've also used Butcher's BBQ Original Brisket injection mixed in but mostly save that for BBQ competitions.
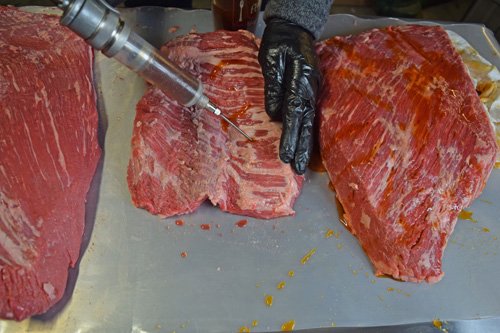 |
| Injecting the point. |
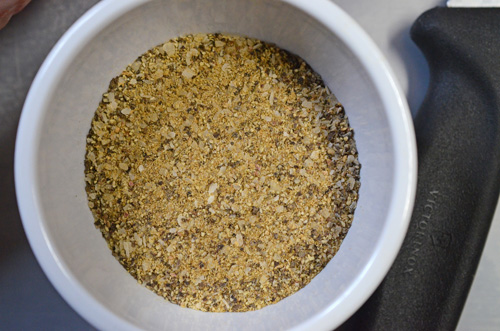
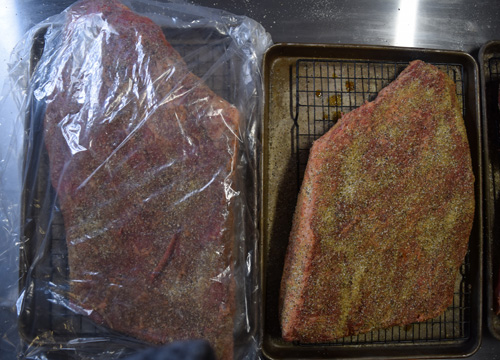
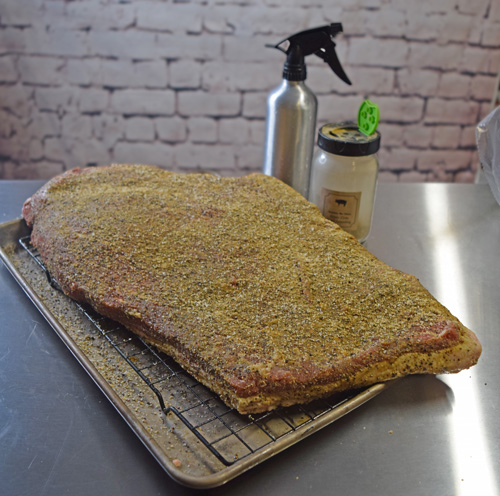
Seasoning – I wipe off the excess injection and lightly apply a few tablespoons of peanut oil all over the brisket. Then a season the brisket all over with about a half cup of either Albukirky Seasoning’s Green Chile Rub or the NMT Green Chile Steak Seasoning recipe from The Offset Smoker Cookbook (my second cookbook).
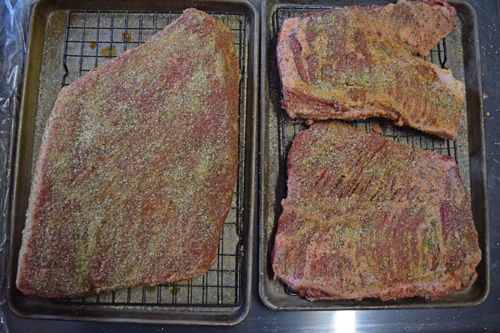 |
| I season my big meats on racks above half sheet pans. That way the rub on the bottom sticks to the brisket instead of flat surfaces like a counter or tray. |
Dry Brine – Dry brining will pull in the salt and flavors and help keep the brisket juicy during the cook. Place the brisket parts on a rack over a half-sheet pan, the rack allows for circulation. Loosely cover it with plastic wrap and place in the fridge for 8 to 12 hours.
Smoker Set Up
I usually do this cook on one of my large Big Green Eggs, but I’ve also done it on pellet cookers, drums, and offset smokers. For making things go smoothly, I tend to set my smoker up long before it’s time to light up. If I’m cooking early the next morning, I have everything ready to go the night before, so all I have to do is fire it up.
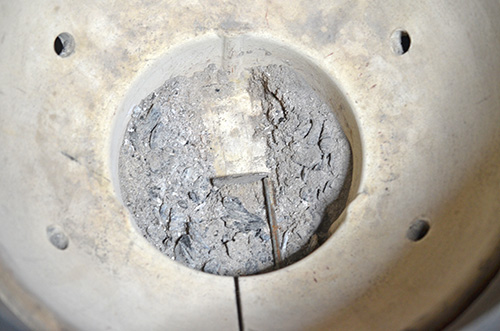
Clean out the Egg – Do yourself, always clean out your Big Green Egg or any smoker before starting any long cooks. That will minimize the possibility of so many potential problems.
Fuel set up –
Kick Ash Basket – Just like cleaning out the Egg, a Kick Ash Basketprovides healthy airflow and a happy fire.
Wood choice – Post oak and pecan are my go-to’s for brisket, but other things work well too. For pellets, I like an oak-hickory-cherry blend. Hickory works fine.
Hardwood lump charcoal – My day to day charcoal is a small label brand made in Tennessee. It’s cheap and reliable but also not widely available. I will buy premium brands, like Jealous Devil, for longer cooks, because the denser wood seems to burn longer and more steadily.
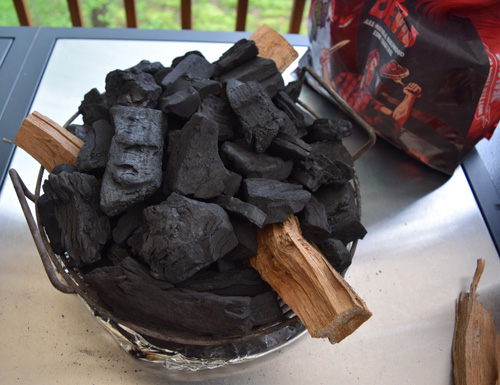
Triangle fire configuration – This is unusual for a kamado grill. Kamados are highly efficient, but that also means less smoke crossing your meat. I came up with this method to help me get more smoke flavor and deeper smoke rings when we were using kamado grills for BBQ competitions. The result is more wood burning more consistently throughout a brisket or butt cook.
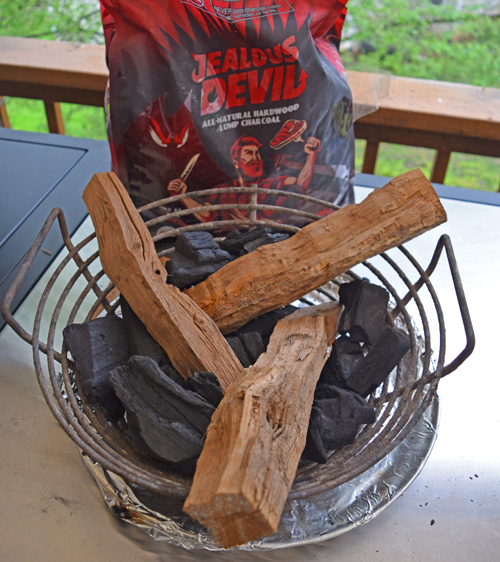 |
| The triangle fire starts with three overlapping 2" x 8" wood splits. I tuck lump charcoal in all the gaps below them. Then I fill in the top with more lump charcoal. |
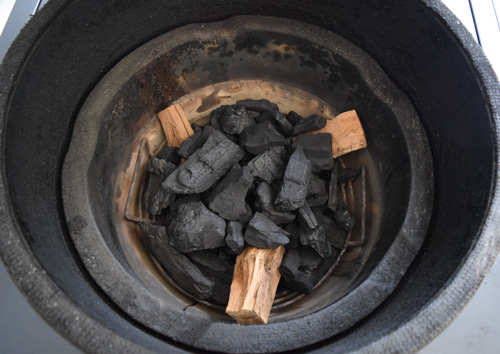 |
| Once it is in the Egg like this, I had my leftover coal from a previous cook that I filled in on top to load the Egg up to the fire ring. |
Indirect Set-Up –A multi-tier setup is ideal so you can fit the point and flat in the Egg without crowding or having a part of the brisket sticking out directly over the fire at the edges. This could be the Kamado Joe Divide and Conquer, BGE Eggspander, or the Adjustable Rig.
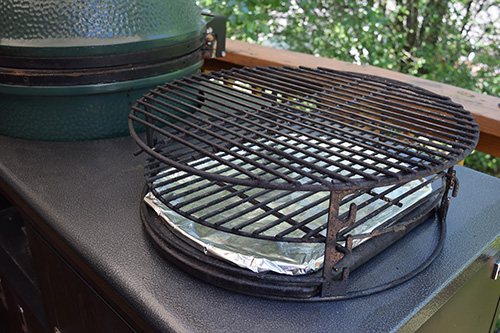 |
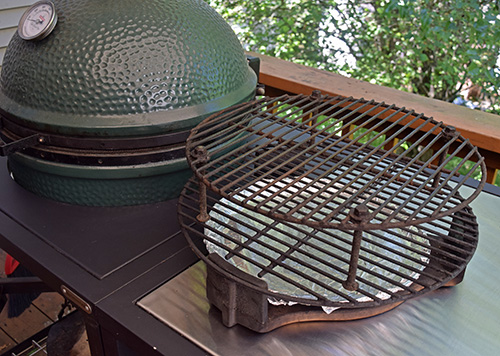
| My go-to set up for this cook is an Adjustable Rig set up using an oblong heat stone, which protects the ends of the brisket. Pictured on a Challenger Designs Torch 48 grill cart. |
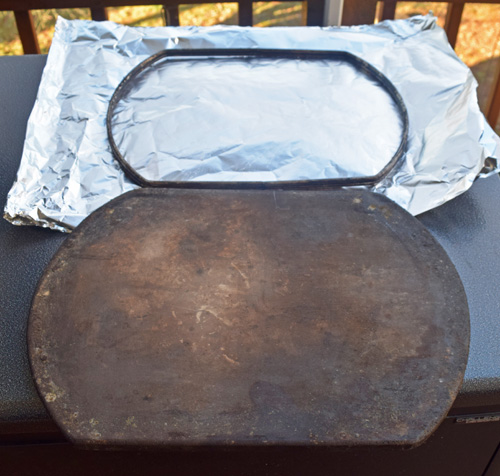 |
| Here's a better shot of the oblong heat stone and the drip pan frame. You wrap foil around the frame and bam - instant drip pan! If you do a lot of ribs or brisket on a kamado grill, you should probably get one of these from the Ceramic Grill Store. They protect the ends of your ribs from burning over a gap left by round heat stones or platesetters. |
 |
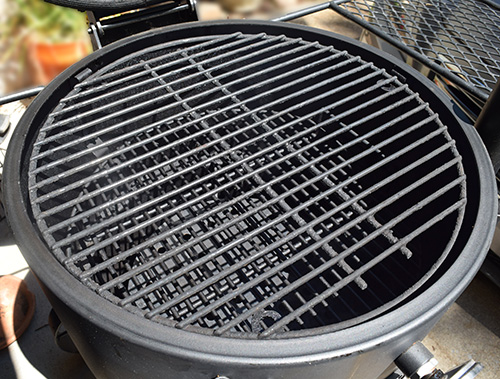
| Another set up would be to use a ConvEGGtor (aka platesetter), drip pan, stock grate and a homemade raised cooking grate as your second level. Pictured on a Big Green Egg Modular Nest from Mannix Pools and Grills (Winter Haven, FL). |
 |
| If I'm using a drum smoker, like this Oklahoma Joe's Bronco, I use two grates - one on the lower set of tabs and one on the upper deck. |
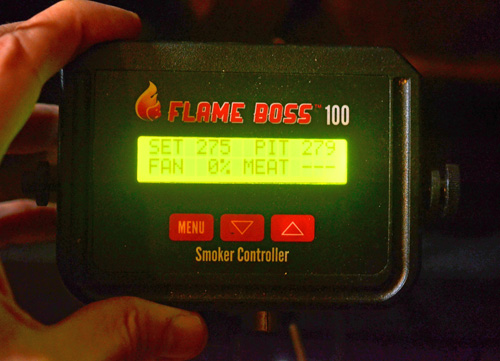
Electronic Controllers – Kamado grills can run long and steady just using natural drafting. But for longer cooks, it is comforting to have extra assurance. Electronic controllers monitor the temp and use a fan to maintain a constant temperature. Most connect to your smartphone, so it makes keeping an eye on your cook much more manageable. I like to use a one because I’m often cooking this overnight and like not having to get out of bed to check on the cooking and food temperatures during the night. Brands include Flame Boss, Thermoworks, and BBQ Guru.
Cook
Now that we have invested a lot of time and effort into a successful cook, it’s time actually to get cooking.
Lighting – My typical process for lighting a Big Green Egg is using a gas torch to light three spots for 25 seconds per spot. In the case of using a triangle fire configuration, I light points that are about 2 inches from the tops of my wood splits. That gets them preheated and burning cleanly.
Lighting – My typical process for lighting a Big Green Egg is using a gas torch to light three spots for 25 seconds per spot. In the case of using a triangle fire configuration, I light points that are about 2 inches from the tops of my wood splits. That gets them preheated and burning cleanly.
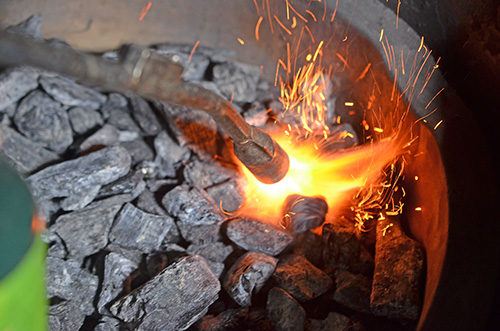 |
| Firing up one of our Eggs with a JJ George Grill Torch. |
Preheat – I light my smoker at least 1 hour before I plan to put my prepped meat into the smoker. It is important to allow plenty of time for your grill to stabilize at your cooking temperature. Remember, when your thermometer hits your target cooking temp, that just means the air has reached that point. The metal and ceramic parts of your grill will take longer to reach that temp, and that’s when your grill gets stable.
Cooking Temperature – For this brisket, I smoke it at 275° to 290°f depending whether I’m trying to slow down the cook or speed it up.
That’s cold, bro – For smoked foods, I want my meat cold when it goes in the cooker. Being cold will give the meat more time when the smoke is most effective. Furthermore, the enzymes calpains and cathepsins get more active at tenderizing meat until the meat reaches an internal temperature of 105-120°f. That’s why I keep the brisket (and all meats for smoking) in the fridge until the last minute.
Freshen up the seasoning – I like to freshen up the seasoning with a light coat of finely ground green chile seasoning right before the meat goes into the smoke.
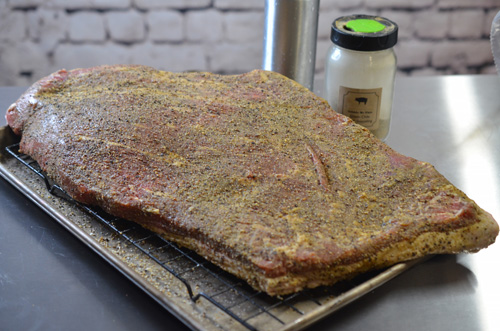 |
| When you first pull the brisket pieces out of the fridge, you will see a lot of the rub has stuck to the brisket, that's perfect. |
Wet is a good bet – I spritz the brisket with a quality apple juice as soon as it goes into the smoker. In his food science masterpiece, Harold McGee points out that smoke vapors adhere more easily to a wet surface (McGee 176). A moist surface also helps the nitrogen compounds in the smoke to bind with the protein myoglobin in the meat, which gives you the pink color visible in smoke rings.
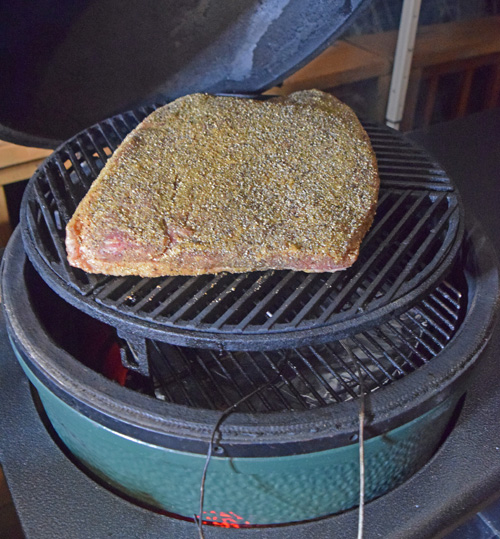
Smoke Session – So I put the flat in the smoker, spritz it and let it cook for one hour. Then I put the point on the smoker, spritz both cuts, and let them go until they get a dark crust on them. On an offset, this will usually be at an internal temperature of about 160°f. For a kamado grill, it will be later, when it hits an IT of about 170-175°f. I spritz about once every hour during this time. Typically this is 5 to 6 hours.
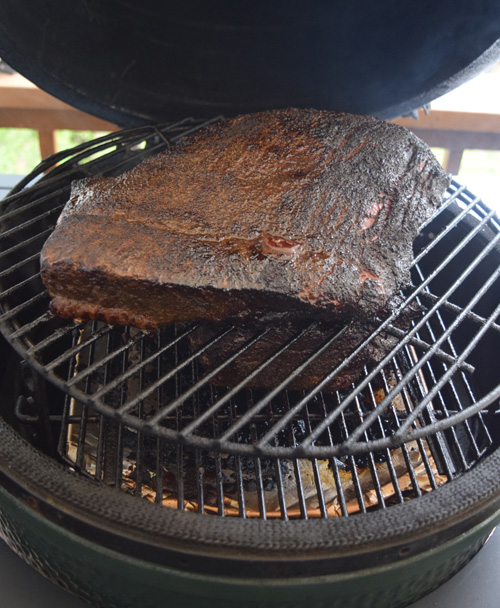 |
| Here is a more typical set up on a different cook. The point is below the flat. Don't forget about it when spritzing. |
Wrap it up – Usually wrapping a brisket is optional for me, except for competition brisket and this green chile one. Braising is where it gets half of the green chile flavor and heat. Plus, we are intentionally slightly overcooking this brisket to get it to fall apart, so this braising will help that along.
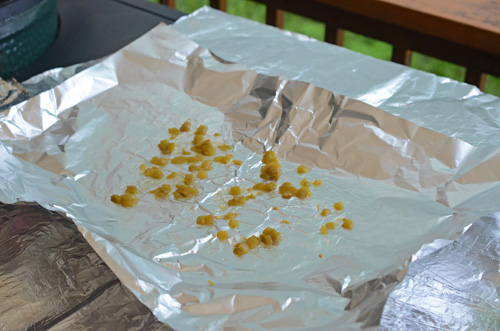
I either use a 24” x 32” piece of foil (It’s expensive!) or two 18” x 32” pieces that I seam together. Line the two pieces up, make two crimped folds, and then open the two sheets like a book.
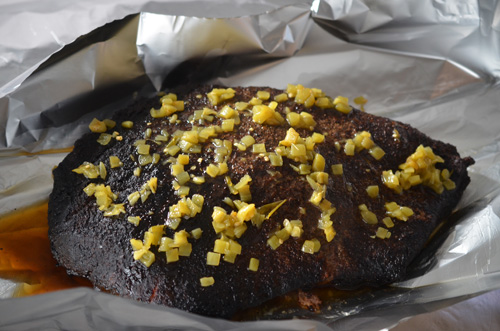
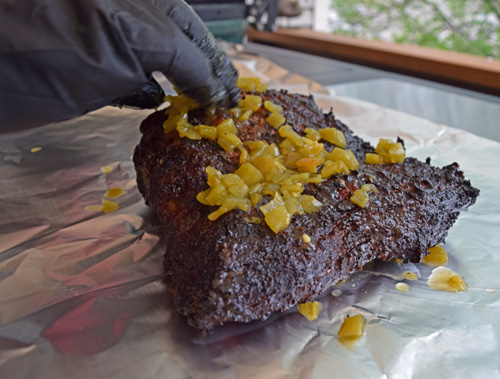
Green chiles– I use a half cup of chopped Hatch green chiles. In a pinch, you can use two fire-roasted poblanos or two 4-oz cans of green chiles. Place about 1/3 of the chiles on the foil and place the flat on top of that. Then place another third of the chiles on top of the flat.
Pour ¼ cup of beef stock around the flat and carefully fold the foil up to create a tight envelope around the brisket. I stick the temperature probe back into the thickest part of the flat.
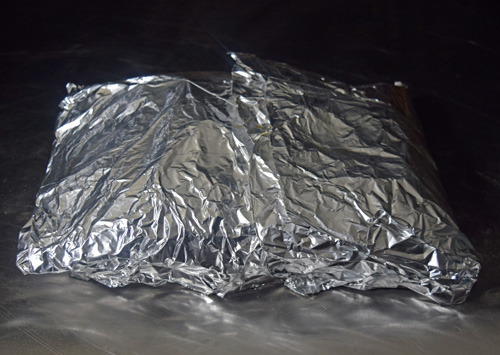 |
| Make sure the foil is tightly packed. |
Repeat for the point section of the brisket, but you should get away with using a single piece of foil, and you only need the last third of the chiles since the point is smaller.
Put them back in the smoker and cook until they are falling apart tender, about an internal temperature of 207°f.
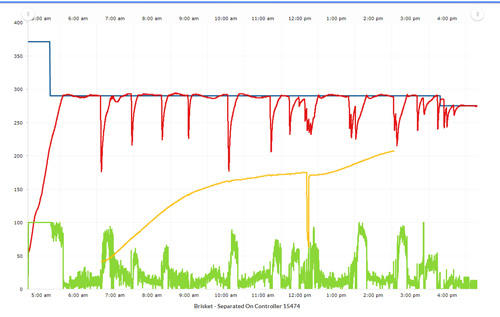
Here is the graph of a typical green chile brisket cook for me. The yellow line is the internal temperature, you can see how the temp was stalling until I wrapped it to braise. The red line is the cooking temperature. The drops are where I opened the Egg to spritz or wrap the brisket. The green line is where the unit turned on the fan to bring up the temperature.
Give it a Rest – You don’t want to skip this step. Put your wrapped brisket into a warm hotbox or cooler to rest for 1-2 hours. I use a Cambro UPC-300 that I preheat by pouring a pot of boiling water in a hotel pan in the lowest shelf. For a cooler, I put the boiling water in until the meat is ready. Dump the water, wipe the cooler dry, put the brisket in, cover with a towel, and shut the cooler. Either way, leave the hotbox or cooler shut for the whole time, so it stays warm.
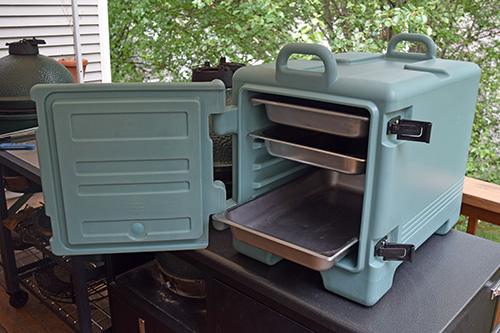 |
| A cooler works but a hot box like this Cambro UPC-300 is a BBQ cook's best friend. It is extremely convenient for holding meats to rest, keeping food warm for hours, or transporting food to other locations. |
Reset the Crust – The braising and resting will make the crust soggy. If you are a stickler for a crisp crust, take it out of the foil and put the brisket back in the smoker for 15 minutes.
Reheat and serve – Most of the time, we are cooking one of these mainly to have for quick meals. We vacuum seal about 3 cups in quart-sized bags and freeze them. To reheat them quickly, I put them in a 3-quart saucepan of boiling water, turn off the heat and let it rest in hot water for 10 minutes. It comes out juicy, warm, and almost as good as the day you first cooked it.
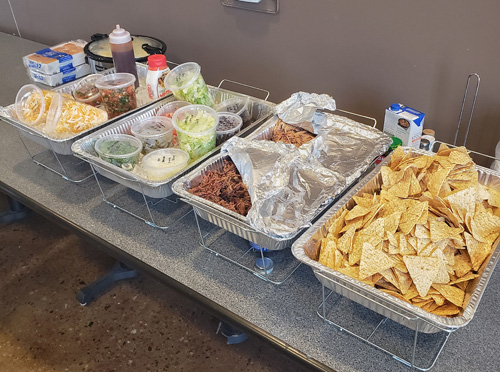 |
| Last semester during finals week, we surprised Trevor and his friends with a nacho bar featuring the green chile brisket. |
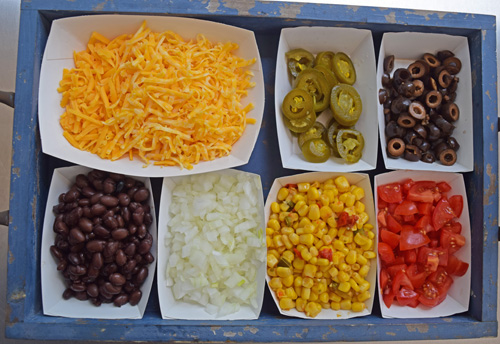 |
| That's probably our favorite way to serve these - just put out a bunch of toppings and sauces and let people make their own nachos, tacos, etc. |
Typical Schedule
Most times, I put my brisket on about 6 or 7 in the morning to have it for dinner. Here’s a sample schedule of it in action. These are rough guidelines (aka your mileage may vary), go by your visual cues and internal temperatures.
Day before the cook
6pm
- Trim brisket
- Inject brisket
- Season brisket
7pm
- Dry brine brisket
- Set up smoker for the following morning
Day of the cook
6am
- Light the fire and bring pit up to temp.
6:45am
- Freshen up the seasoning
7am
- Brisket flat placed in the smoker and spritzed.
- Brisket point added to the smoker, both spritzed.
8am – noon
- Keep an eye on the cooking temperatures.
- Spritz hourly.
Noon – 2pm
- Wrap brisket when ready based on color and internal temperature.
2pm – 4pm
- Keep an eye on internal temperatures.
- Pull brisket when tender and almost ready to fall apart (about 207°f or higher)
- Rest brisket
4pm – 6pm
- Slice and serve

