

Friends, Im thrilled to be here to bring you this fantastic recipe for potato sandwich bread today!
Soft and flavorful, this potato bread toasts beautifully, stands up to thick spreads and other sandwich fixins, and is very easy to make.
If youre a fan of making baked goods with potatoes, you may also want to take a look at my super soft sandwich rolls or this fantastic recipe for mini brioche buns.

Why Potato Bread?
Unlike traditional homemade sandwich bread that can stale in as little as a day, potato bread stays soft and fresh for a few days at room temperature.
I also love potato bread for its slightly boingy softness and its ability to stand up to buttering, toasting, and the spreading of spreads like mayo, mustard, and even peanut butter.
For my money, potato bread is a better investment in time, since you know itll keep longer. Plus the added potato does bring a bit more nutritional value and flavor to the sandwich bread party.
How Does It Stay Fresh?
Potato bread is very similar to tangzhong bread. Tangzhong relies on cooking a portion of the flour with a portion of the liquid in a bread recipe and then adding it back into the rest of the dough.
What this does is gelatinize some of the starches in the flour. This does two things:
- the gelled starches hold on to that liquid, and thats part of what helps to keep the bread so soft
- gelatinizing a the starches in a portion of the flour also keeps the proteins in that same flour from combining and forming gluten. Thisll keep your bread softer and less chewy.
In the case of potato bread, the mashed potato plays the part of the Tangzhong. You get the starch matrix holding onto the liquid it was cooked in much like you would with Tangzhong, and you also end up using less flour because youre substituting potato.
In a way, making potato bread is like making a shortcut Tanghzhong bread. Sweet!
How Long Does Potato Bread Last?
At our house? Not very long!
Sorry. I couldnt resist!
Potato bread will stay fresh, wrapped in a lint-free kitchen towel, for a good 4 days before slicing.
Since sliced bread doesnt have the protection of the crust like a whole loaf does, I dont recommend storing the sliced bread at room temperature.
For longer storage, I like to slice the whole loaf as soon as it cools completely, place the slices in a zip top freezer bag, press out as much of the air as I can, and then freeze.
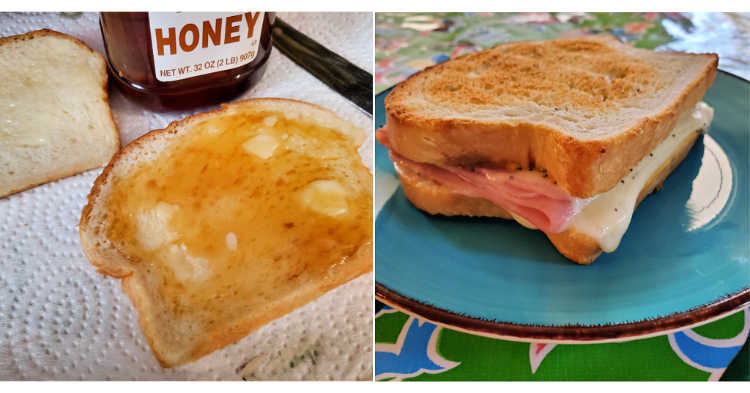
I remove slices as I need them to make toast, sandwiches (yes, a bread butter and sugar sandwich counts!), or what my grandfather used to call a jilly piece. Thats a slice of bread slathered in butter and jam or jelly.
How to Make Potato Sandwich Bread
Ingredients

Bread has been made literally for millennia out of easily obtainable ingredients. This sandwich bread is no different. I bet you have most if not everything you need to make it right now:
- Russet potato (commonly referred to as a baking potato)
- instant yeast
- sugar
- water from cooking the potato
- butter
- vegetable oil
- salt
- eggs
- bread flour
Procedure
This bread is pretty straightforward to make. Heres the rundown:
- Cook the potato in plain water. Reserve some of the cooking liquid and mash the potato.
- Let potato and water cool to just warm.
- Put all the rest of the ingredients in the bowl of your stand mixer and mix until you get a nice dough.
- Knead for about 10 minutes or until the dough is smooth, shiny, stretchy, and pulls away from the sides of the bowl in sheets.
- Refrigerate overnight.
- Split in two and shape into loaves.
- Let rise.
- Bake.
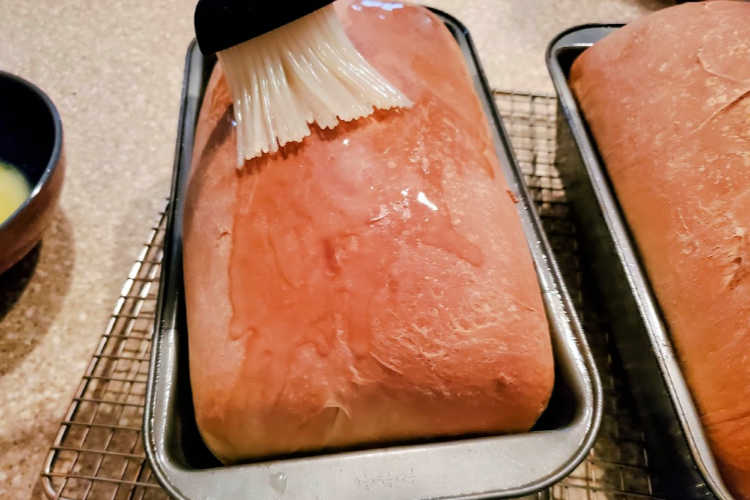
- Brush hot loaf with melted butter.
- Cool and enjoy.
Shaping the Loaves

Pretty much all loaf breads are shaped the same way.
- Press the dough into a rectangle.
- Roll the rectangle into a log, starting from a short end.
- Tuck the ends under.
- Place in loaf pan.
Why do we shape loaves of bread like this?
Its more than just convention.
Forming loaves in this way allows for a tighter, more uniform crumb and a nice smooth top of your bread.
If you just haphazardly shape each piece of dough into a loaf shape, you can end up with very flimsy slices of bread.
Taking the time to press out the dough and roll it up before baking makes for a sturdier slice. And sturdy slices are perfect for making sandwiches!
More Bread Recipes
If you love a nice soft-yet-chewy sandwich bread and can get your hands on some spent grains from home brewing beer, my spent grain sandwich bread is really very good.
And if you love a good focaccia, I highly recommend this grandma pizza dough recipe. Its great for pan pizza, Sicilian pizza, stromboli (when rolled out thin), and of course focaccia.
If youre more into sourdough, you cant go wrong with this beautiful whole wheat sourdough artisan style loaf or this sourdough apple bread. Yes please!
A Note About Measurements
NOTE: Most of my recipes are written by weight and not volume, even the liquids.
Even though I try to provide you with volume measurements as well, I encourage you to buy a kitchen scale for ease of measuring, accuracy, and consistency.
This is the scale I use, love, and recommend:
I really hope you love this sandwich bread recipe, you guys!
If you make some, please share a photo with me, either in the PCO Facebook Group or on instagram by tagging @onlinepastrychef and using hashtag #pcorecipe.
Thanks, and enjoy!

Potato Sandwich Bread Recipe
This soft potato bread smells amazing baking, and it tastes even better. A beautiful, sturdy-yet-soft yeast bread that makes fantastic sandwich bread and toasts beautifully. Potato bread stays fresh and lovely at room temperature for at least 3 days which gives you plenty of time to dream up delicious ways to use it!
Ingredients
For the Dough
- 1 large Idaho Russet potato
- 2 1/2 teaspoons instant yeast
- 2 oz (about cup) granulated sugar
- 11 oz (1 cup plus 2 T) water from cooking the potato, cooled to warm
- 4 oz (1 stick) unsalted butter, softened
- 2 oz (about cup) neutral vegetable oil
- 2 1/2 teaspoons salt
- 2 large eggs
- 30 oz (about 6 cups) bread flour
To Finish the Loaves
- 2 oz (1/2 stick) melted butter
Instructions
- Wash, peel, cube, and boil the potato in plain unsalted water for about 12 minutes, or until tender.
- Drain the potatoes over a bowl to catch the water. Measure out 11 oz of potato water and set aside to cool down.
- Mash the potato (by itself without butter, milk or seasonings) and measure out the 6.5 oz (about 1 cup, slightly packed down.) Save the rest of the potato for another use.
- Add all the ingredients for the dough (mashed potato, instant yeast, sugar, reserved cooking water, butter, oil, salt, and eggs) to the bowl of your stand mixer fitted with the paddle attachment.
- Mix on low speed to incorporate all the ingredients.
- Beat on medium low speed for 3 minutes.
- Switch to the dough hook and knead on medium speed for 7-10 minutes, until the dough is very shiny, smooth, and stretchy. NOTE: The dough is pretty sticky, so a lot of it will remain stuck in the bottom of the bowl. The sides will mostly clear of dough. When its ready, it should be pulling away from the sides of the bowl in sheets.
- Once smooth and supple, scrape the bowl down off the sides and into a compact round shape using an oiled spatula.
- Spray the exposed dough with pan spray or brush with oil.
- Cover the bowl with plastic wrap and refrigerate for at least 8 and up to 16 hours. The dough will be about doubled in size after refrigeration.
- Remove the dough from the fridge and cut into two equal pieces. To be completely accurate, I weigh the whole amount of dough and divide by 2.
- Press each piece firmly onto the counter to release as much of the trapped gases as you can.
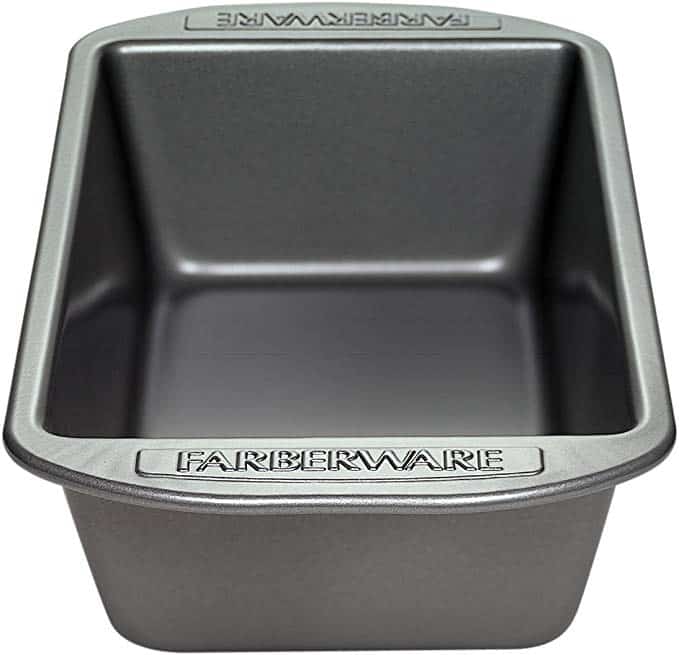
Shape into a rectangleit doesnt have to be perfectof about 15 tall and 10 wide. - Starting from a short end, roll each half of the dough tightly into a log. Press from either end of the log to compact it so it will fit into a 9x5 bread pan.
- Pan each log of dough in the same way and spray the tops with pan spray.
- Cover and let rise at room temperature until the dough rises above the top of the pans by about an inch. This could take a long time since your dough is starting out refrigerated, so plan for at least 3-4 hours, depending on the temperature of your kitchen.
- Preheat the oven to 350F.
- Bake the loaves for 30 minutes.
- Rotate the loaves 180 degrees, tent with foil, and bake an additional 5-10 minutes, until the loaves reach 195-200F with an instant read thermometer. Loaves will be deeply golden brown.
- Brush the tops of the loaves with the melted butter. This will make for a softer crust and lend a touch more richness.
- Allow loaves to cool in the pans for 15 minutes then turn out onto a cooling rack to cool completely.
Notes
Splitting the Recipe in Half
You can divide all the ingredients except the yeast in half to make just one loaf of bread. Use 1 1/2 teaspoons of instant yeast for 1 loaf of bread.
Freezing and Thawing
I suggest freezing the bread sliced rather than in whole loaves. To freeze, once the loaves have cooled completely, slice the entire loaf with a serrated bread knife. Stack the slices in 2 or 3 stacks and place them in a heavy duty zip top freezer bag. Gently press out as much air as you can before freezing for up to 6 weeks without any loss of flavor.
To thaw, take out the slices you need and either microwave them for about 10 seconds or let them thaw on the counter. This will only take a few minutes.
NOTE: Since the bread is moist, the slices may stick together when freezing. I don't worry about it much and just pry them apart--gently--with a butter knife, but you can avoid having to pry anything by separating each slice (or two slices) with a piece of parchment paper.
Recommended Products
As an Amazon Associate and member of other affiliate programs, I earn from qualifying purchases.

Nutrition Information
Yield 24 Serving Size 1 sliceAmount Per Serving Calories 219 Total Fat 9g Saturated Fat 4.3g Cholesterol 31mg Sodium 315mg Carbohydrates 30g Fiber 1g Sugar 2.5g Protein 4.5g
And there you have it friends. Enjoy the potato bread.
Thanks for spending some time with me today. Take care, and have a lovely day.
The post Soft Potato Bread for Sandwiches and More appeared first on Pastry Chef Online.