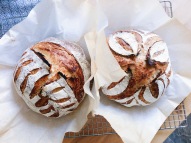
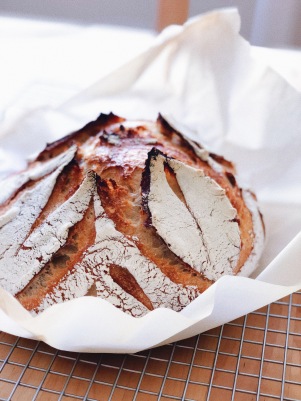
A few weeks ago a friend brought me my first ever sourdough starter! I’ve wanted to try making sourdough for a long time, but it always seemed like a daunting task, even for an experienced baker! So I got on youtube, watched everything I could find, and decided to go for it! This recipe is my best attempt to compile my resources, helpful tips and instructions based on trial and error. Here goes!
If you’re an inexperienced baker, I recommend watching BOTH of these youtube videos before beginning this process!
Sourdough Basics: https://youtu.be/bSYdABrPrtM
Mistakes & Tips: https://youtu.be/BJEHsvW2J6M
This cheat sheet is a really great way to see what time of day you should begin the process of baking your sourdough. It will be a minimum of 18 hours.
Timing Cheat Sheet: https://bit.ly/2UmScvw
If you can get a sourdough starter from a friend, wonderful! If not, here’s a great how-to video on how to make your own from scratch! It will take 7 days, but I promise it’s worth it!
Starter How-To: https://youtu.be/sTAiDki7AQA
Supplies & Ingredients:
• Kitchen Scale
• Large glass or stainless steel bowl
• Banneton Proofing Basket OR a clean kitchen towel (be sure it has a tight weave to prevent sticking)
• Bread Scoring Tool or sharp knife
• Dutch Oven (don’t have one? Use a baking sheet, or a large pot with a lid)
• All Purpose Flour
• Whole Wheat Flour
• Rye Flour (For feeding your starter. Not necessary, but makes it even more tasty!)
• Activated Sourdough Starter
• Iodized Salt
• Water
• Feeding your starter •
40 Grams (~4 tbsp) White or Rye flour
40 Grams (~3.5 tbsp) room temp water
(80 grams total)
Add flour and water. Mix with a chopstick until combined. Replace lid loosely. Feed it everyday if you plan to bake. Ideally, feed your starter & autolyse your dough at the same time. If you’re not baking, place the starter in refrigerator for up to 4 days to slow fermentation.
• Autolyse •
Mix flour and water together with one hand to form a shaggy mass.
Autolyse is a technique that is easily introduced into your bread making routine and delivers a dough that’s easier to work with and shape, and a loaf with better texture, rise and flavor.
340 grams of room temperature Water
400 grams of white bread flour
100 grams of wheat bread flour
2-7 hours later …
Add starter and salt to the dough. Incorporate dough with your hand, salt and starter.
12 grams of salt
60 grams of starter (starter must be activated & bubbling)
30 minutes later….
Using the stretch and fold technique (watch the youtube videos!), work your dough. Use a small bowl of water to wet your fingers, and sprinkle water on the dough so it doesn’t stick to your hands. Repeat this every 30 minutes for 2 – 2.5 hours (about 4 times), until you feel the dough has developed a nice gluten structure (stretchy).
• Bulk Rise •
After you stretch and fold your dough, it’s time for your bulk rise (otherwise known as proofing). Allow the dough to rise, in the bowl, covered with plastic wrap for 3-8 Hours at room temp (70-75°) or 12-20 Hours (or overnight) in the refrigerator.
I don’t love proofing my dough in the fridg! If you need to, for the sake of time, you’ll need your dough to come back to room temp before baking!
Let dough proof until it has risen 30-50% in size.
• Pre-Shape & Bench Rest •
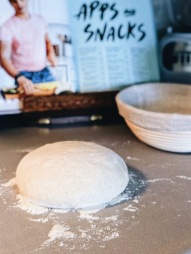
Once you’re satisfied with your bulk rise. Turn out the dough onto a lightly floured surface, use your fingers to free the dough from the sides of the bowl. Using the stretch and fold technique, pre-shape your loaf into a round. Allow the dough to rest on the counter, covered, for 30 minutes.
• Final Shaping & Proofing •
Flour your proofing basket really well. Give your loaf one final shaping and put it, bottom side up, into the floured proofing basket. If you don’t have a banneton (proofing basket), flour a kitchen towel, place it inside of a bowl, add dough, and cover with plastic wrap. Allow your dough to proof at room temperature for 2-3 hours, or until it bounces back when you lightly poke it.
• Baking •
Preheat the oven to 500°. Place the Dutch oven into the oven while preheating.
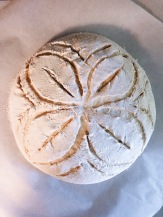
Turn out dough from the proofing basket (right side up) onto parchment paper and score the top with a sharp knife or scoring tool.
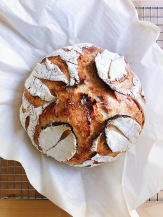
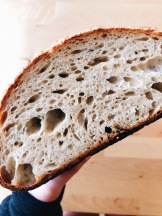
Once pre-heated, take the dutch oven out. Place dough, on parchment, into the Dutch Oven. Replace the lid, return to the oven and bake for 20 minutes. Then, reduce the oven temp to 450°, remove the lid and bake for an additional 20-30 minutes, or until nicely browned on the top. Remove from the oven, and allow the bread to cool on a cooling rack for at least 30 minutes before slicing!

