

So, a lot has changed in Europe since my last blogpost; the Corona Virus crisis has meant that more people are spending more time at home, and away from work, and are looking for things to do. This has lead to a boom in bread-making and, thanks to a shortage of yeast, a widespread interest in yeast-less sourdough methods (I realise everyone reading this is well aware of all that, and I’m mostly writing it for the benefit of future-me, who’ll look back on this having forgotten the details of the circumstances.)
Sourdough can be a rather cruel master. It can be wasteful, challenging, disappointing and frustrating, so I recommend that anyone who hasn’t made a fair bit of great already do whatever they can to get hold of some yeast, and start with this recipe, which is broadly foolproof and won’t result in anyone throwing bagfuls of flour in the bin.
That said, as someone who has experienced all the sourdough frustration you can imagine over the years, I’ve tried to keep this method as simple and dependable as possible and, so far, friends who have tried it have all had fantastic results.
Like all sourdough methods, you’ll need to begin with a starter, a recipe for which you can find HERE. I would recommend always using a 50/50 starter (meaning equal amounts of flour and water), weighing rather than measuring your ingredients by volume (this is something you should get used to in bread making, even when measuring liquids) and, at least for now, using white flour. The first and last of those rules is there to be broken, but probably only once you’re very, very confident in the process.
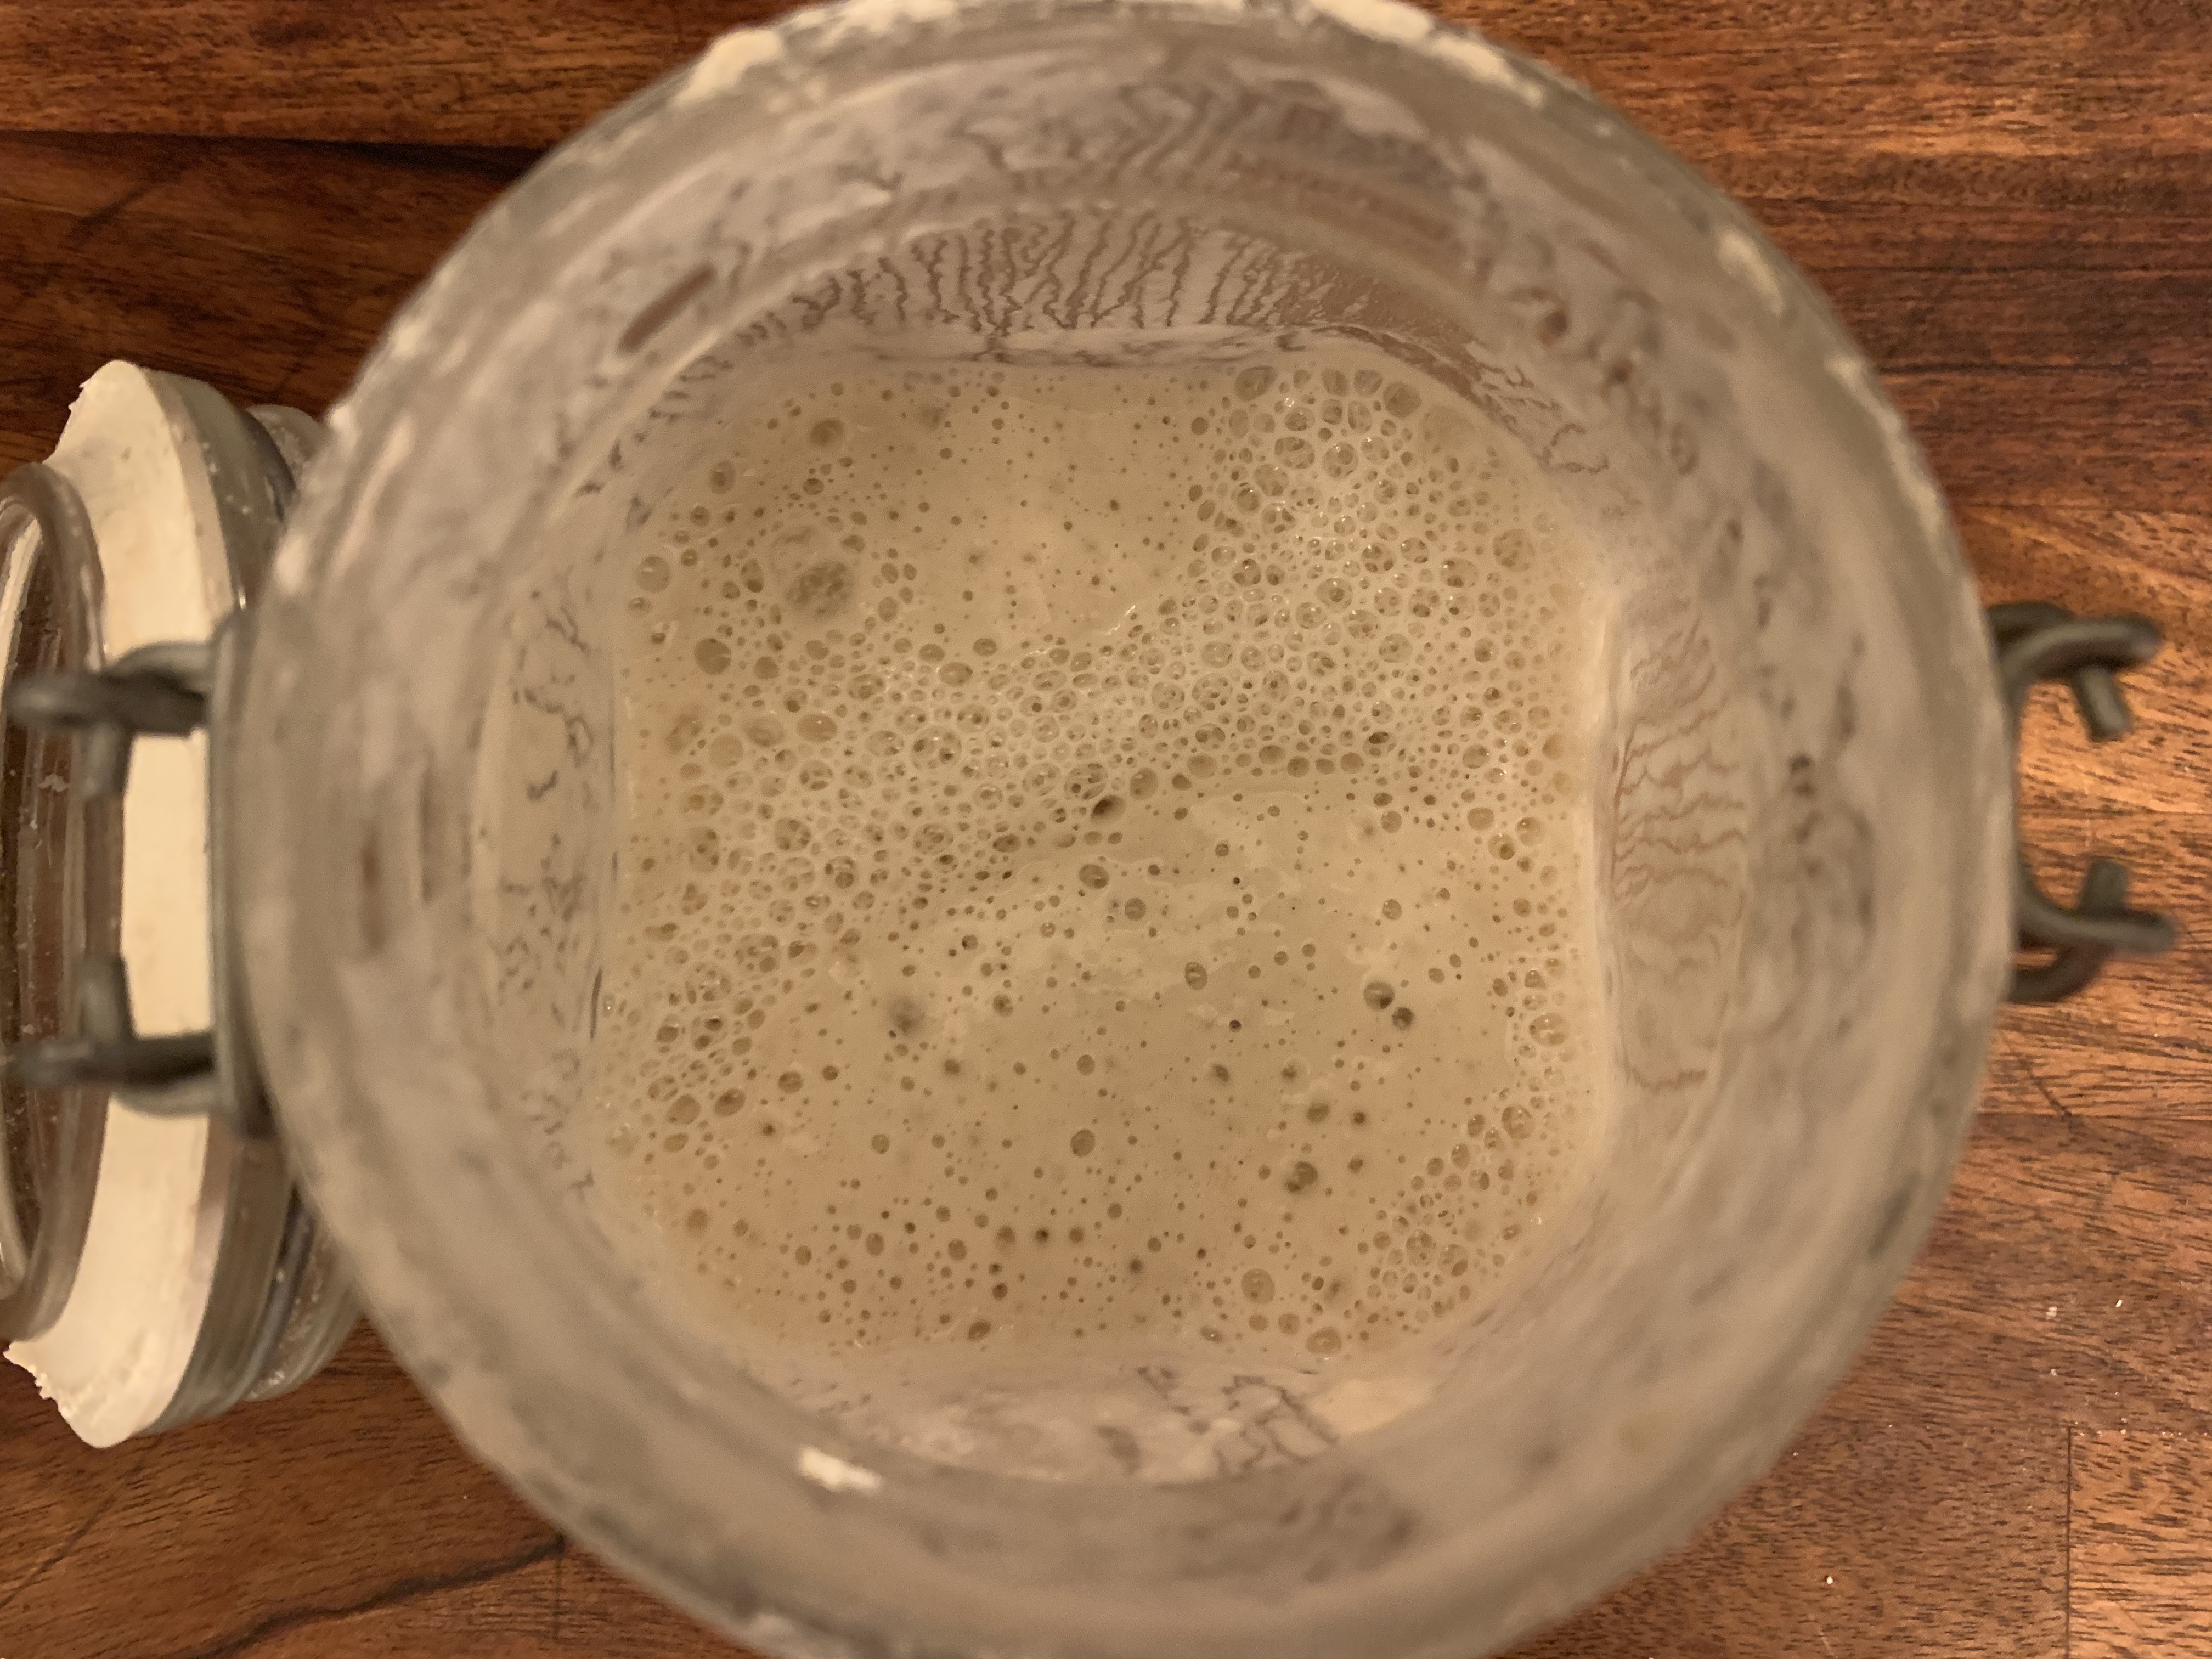
A sourdough starter, ready to use
My ideal method of preparing this bread at home is to prove it in a spiral-wound basket and then bake it in a large, heavy lidded casserole. In the name of getting everyone baking though, you could also prove in a bowl lined with a well-floured tea towel, and bake on a baking stone, or your heaviest baking tray.
This recipe takes 24 hours in total to complete. It’s certainly not a sir fry. The good news is, though, that you need spend very little time actually working on it, and there’s nothing that you’d call kneading involved. For the most part, you’re there to facilitate the things that it gets on with quite happily on its own. The perfect recipe for someone who’s at home a lot!
You will need:
For the first stage –
- 250g strong white flour
- 385g tepid water
- 100g active sourdough starter
For the second stage –
- 300g strong white flour
- 10g salt
First mix together your first stage ingredients in a bowl til there are no lumps, cover, then leave at room temperature for 6-12 hours. I tend to do this overnight.
After this period, your first stage should be very bubbly. Almost frothy.


Weigh your second stage ingredients into a large bowl, add your first stage mixture, then combine them thoroughly, to form a ragged, sticky dough, with no dry, floury pockets. It might be worth leaving a tap running ready to clean your hands after this, cause the dough will stick. scrape as much dough from your hands as possible into the bowl, then wash your hands and cover the mixing bowl with a clean tea towel. Leave at room temperature for an hour.
Give your work surface a wipe with a clean, wet cloth to dampen it, scrape around the edges of your dough using a dough scraper or a flexible spatula, and tip the dough out, top-side down, onto the work surface. Grasp one side of the dough, give it a good stretch, and fold it over to its opposite side. Grasp the dough a quarter of the way around the ball, and do the same. Repeat this 6-8 times, supporting the dough with your free hand if it starts to pull away from the work surface. Once you’ve done this, the dough will probably be noticeably smoother and more stretch, and almost certainly less sticky, too. Scrape it up to loosen it from the work surface using your dough scraper/spatula, and then put it back in the bowl, turning it over as you do so, so it’s in its original position. Cover again, and leave for another hour.


Repeat this process three more times, so you do a total of four stretch-and-fold sessions. You’ll find that with each stretch-and-fold, your dough will become smoother, firmer, less sticky and more able to support its own weight. This is the process of the gluten that will give your bread a nice, springy rise in the oven forming. It’s a kind of magic, to me, still, even after making hundreds of loaves.
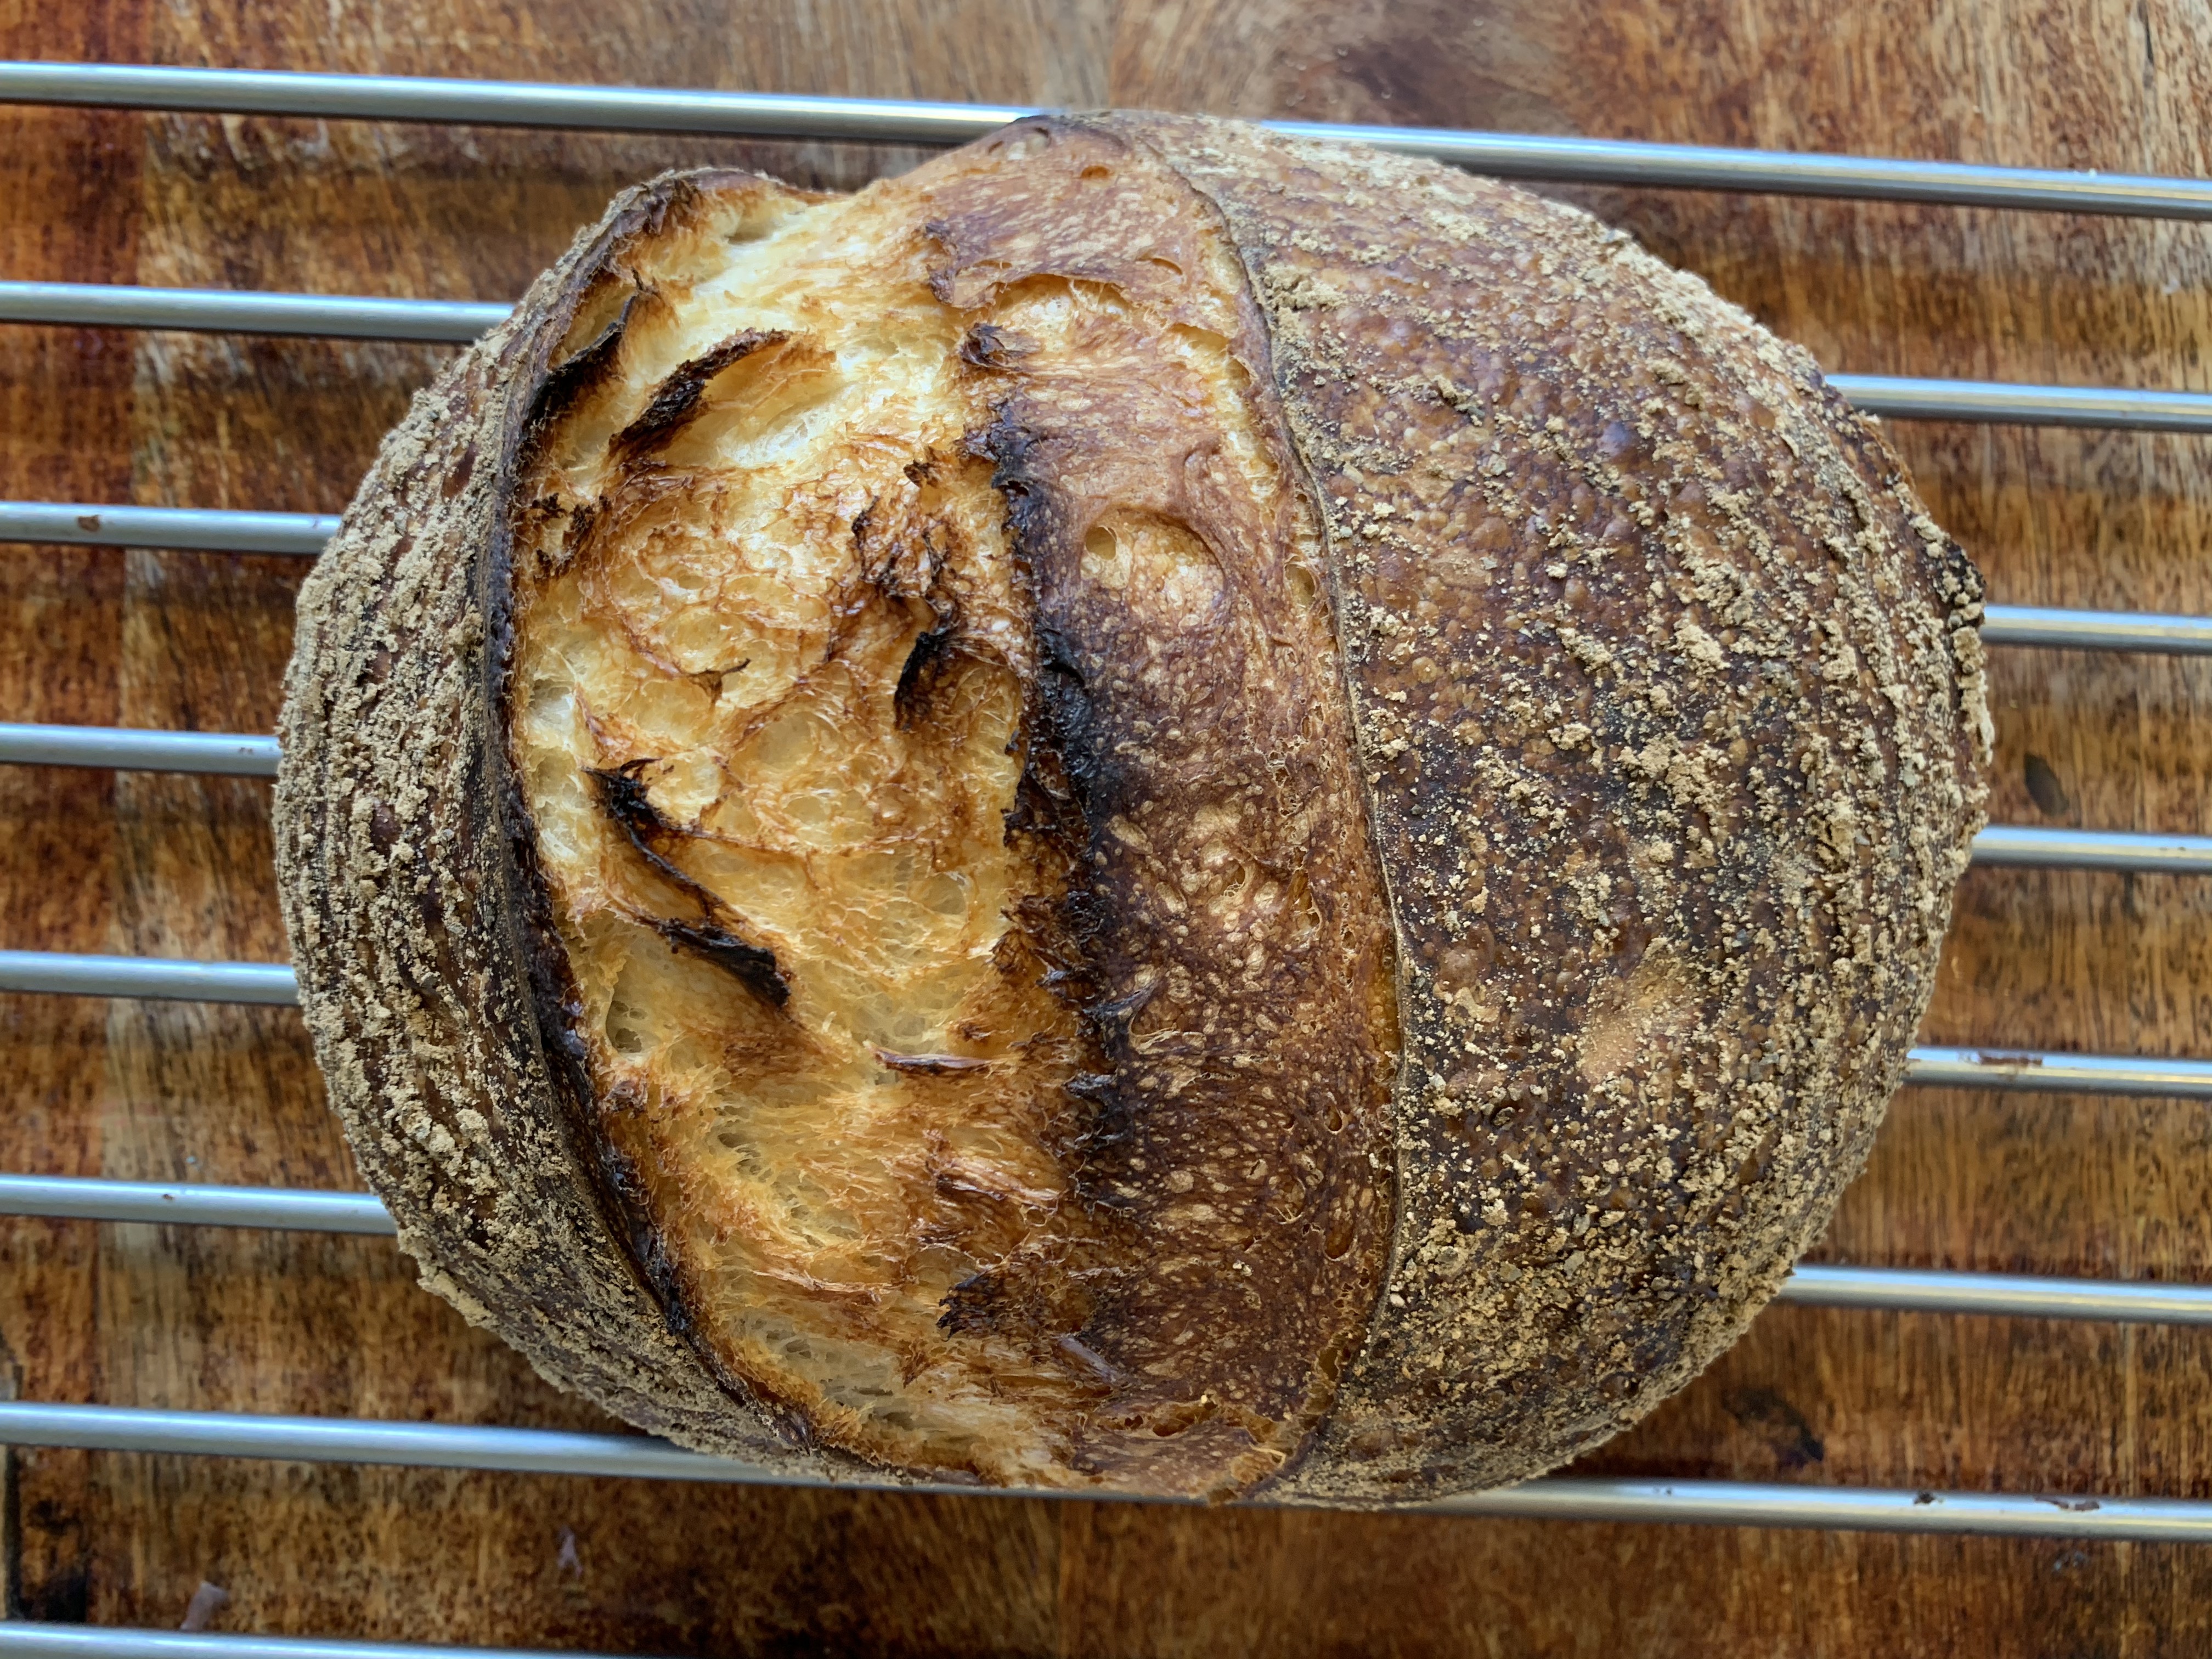
Flour a proving basket, or place a very well-floured teatowel into a medium-sized bowl. I tend to use coarse rye flour, which stops the dough sticking really well, and looks nice on the finished product, but use whatever you have.
Once your fourth stretch-and-fold has finished its hour’s rest, lightly flour the work surface and scrape out the dough. It should be pillowy almost, by now, and will probably have some substantial bubbles, nestling beneath its surface. Very gently flatten out the dough a little, trying your best not to break its surface, then do a few final stretches and folds, pressing firmly but gently into the dough to form a nice round, ovular ball shape. Turn the dough over, so it’s floury side up, and bring your hands together under the dough-ball, turning it slightly as you do, so the top stretches to a nice smooth surface. After a few of these final shaping movements, carefully place the dough into the proving basket or bowl top-side down. Pop the basket into the fridge, uncovered (this is important) and leave it there for a minimum of 12 hours, and anywhere up to around 20. I tend to aim for roughly 16.


Once your dough is proved, heat you large cast iron lidded pot in the oven, lid and all, as hot as it’ll go, for about half an hour, or until the oven reaches the temperature you set.
Take the dough out of the fridge, take the pot out of the oven, remove the lid, and very carefully invert the proving basket into the pot so the dough gently drops out, exposed side down. Take a small, very sharp knife, and make a shallow slash across the top of the dough, using a single, definite movement (needless to say, please be very, very careful not to burn yourself on the pot during all this) then place the lid firmly on, put the pot into the oven, and turn the heat down to 250ºC.


Bake for 20 minutes, then remove the lid, quickly closing the oven door afterwards and bake for another 20 minutes, before removing the pot, carefully lifting out the bread and leaving to cool completely on a roasting rack.
ALTERNATIVELY
Instead of using a pot, preheat a baking stone or the heaviest baking tray you have, and boil the kettle. Invert your proved dough onto a well-floured board (or even better, dust it with semolina), slash the top, as above, and then gently slide the dough onto the baking surface, before throwing a mug of the freshly boiled water onto the bottom of the oven and quickly closing the door before the steam escapes. Turn the heat down to 250ºC and bake for 40 minutes, then remove and leave to cool.
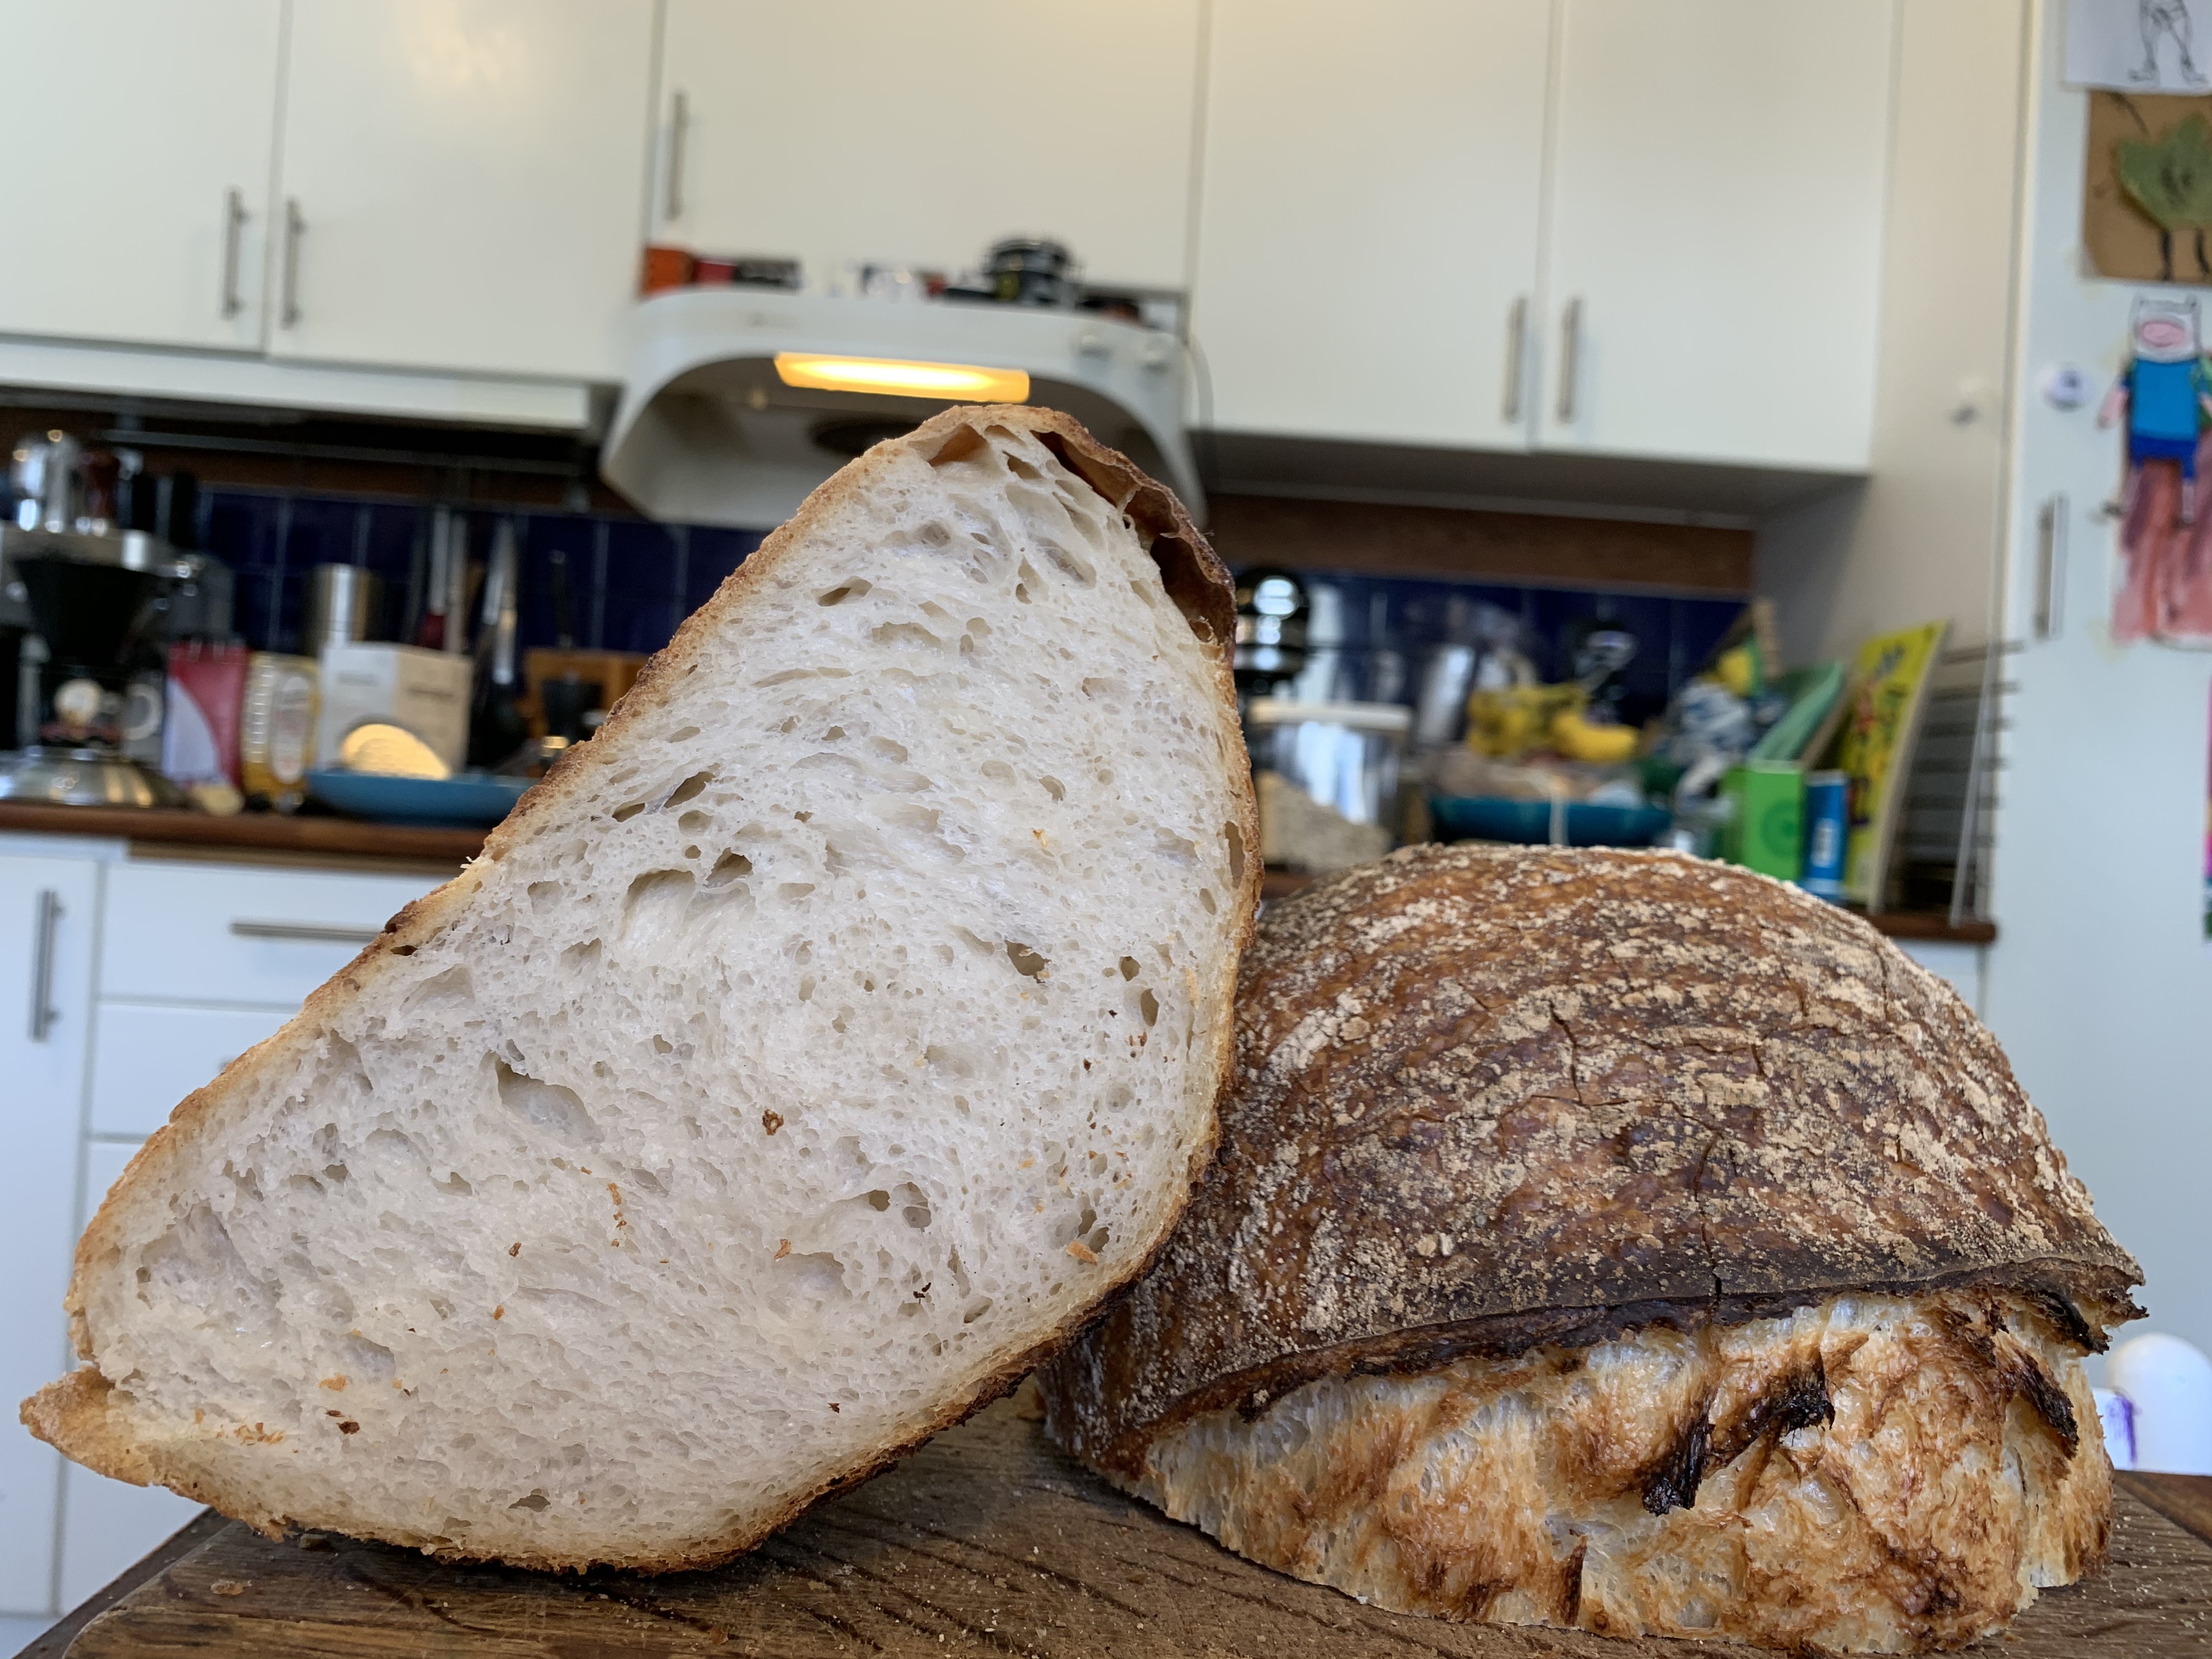
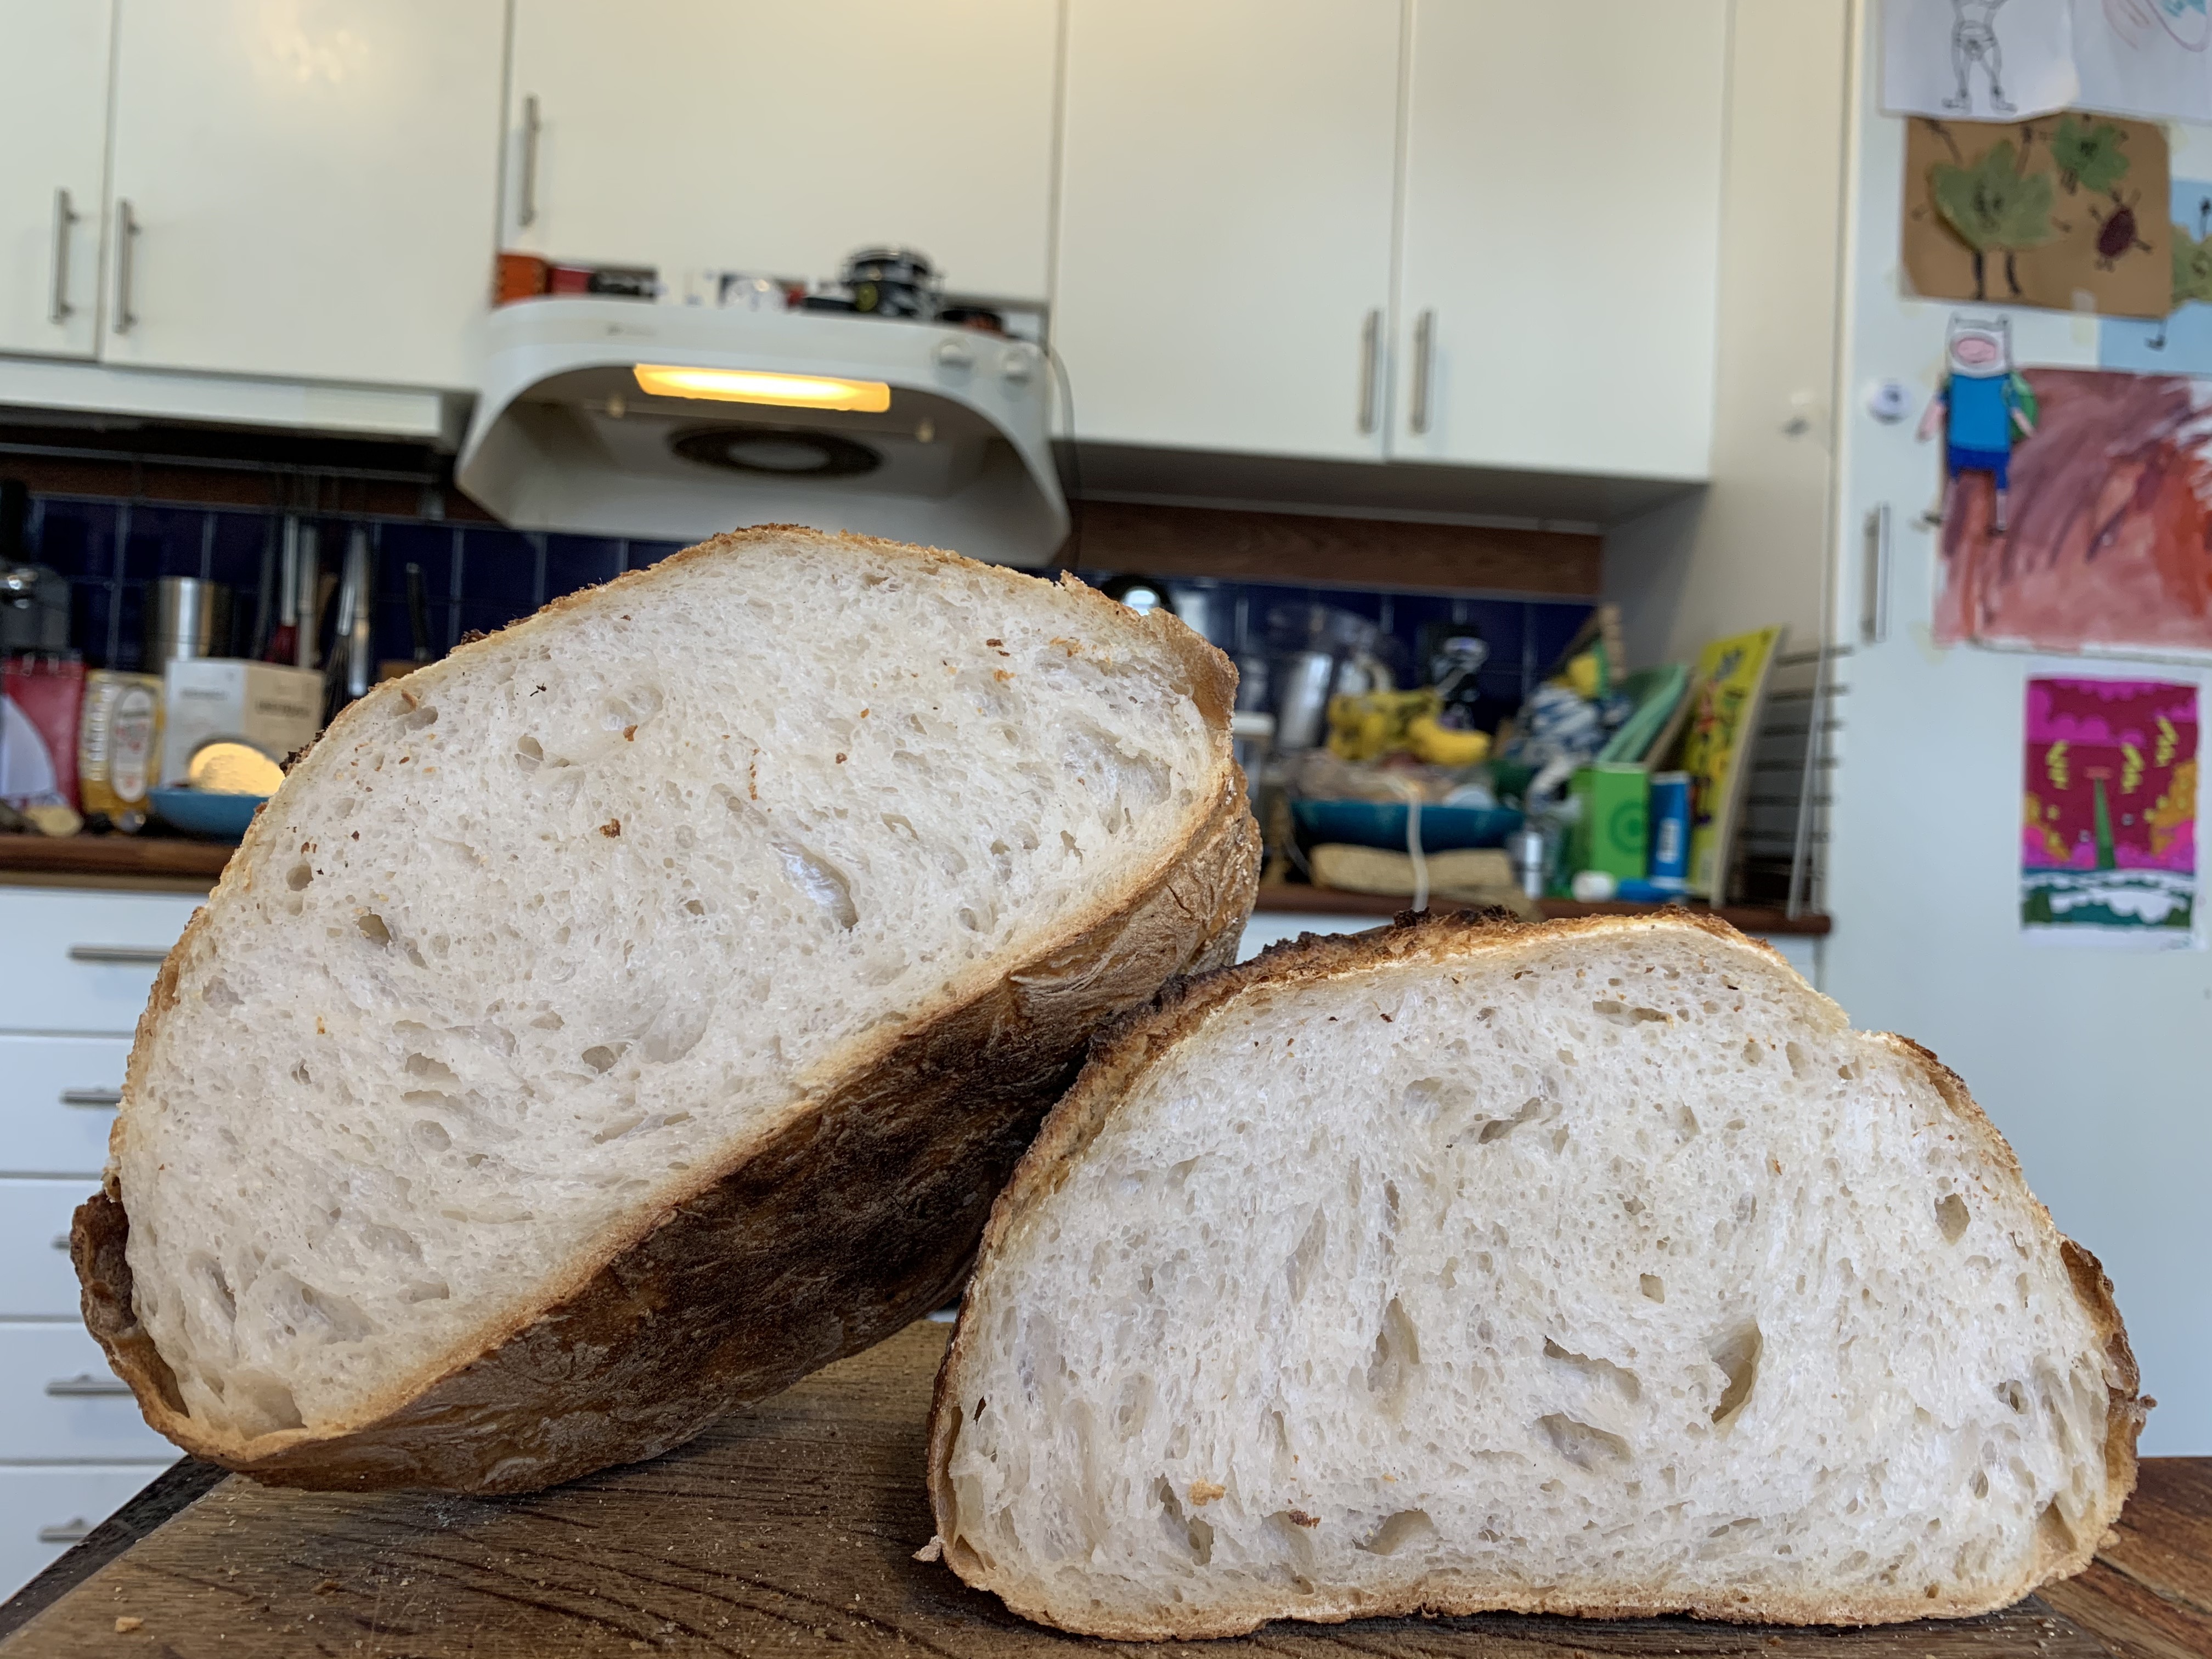
Once your bread is completely cooled (and believe me, tempting as it is, it really is worth waiting for it to cool properly) slice in, and use it as you will.
That first day, your bread will be good for whatever you’d like to use it for, and then, for a good three or four days after, a well-wrapped loaf will be excellent for toast. Beyond that point, cut off the crusts, tear it up, and stick it in the food processor to create better breadcrumbs than it would ever be possible for you to buy, then use those for whatever you like.
Variations
Of course, it is entirely possible you don’t want to make pure, white bread every time you bake (although a sourdough loaf will have more flavour and substance than anything you’re likely to be able to pick up at the average supermarket). I would suggest following the method above the first couple of times you attempt this, partly to find your feet with the approach, and partly cause white flour is relatively forgiving compared to others, particularly darker flours, which can be devilishly sticky and respond differently to the same levels of hydration.
That said, once you’re confident, feel free to vary at will. I’d suggest making small, single variations at first so that, if something goes wrong, it’s easy to pinpoint what it was; try using a rye starter, or subbing out 100g of the flour in the recipe for spelt, rye, wholemeal or einkorn. Add nuts or seeds when you mix your first stage together, or dip the entire loaf into a bowl of oats, poppy seeds or pumpkin seeds before you bake. Raise or lower the water content by 10 grams and see what difference it makes to the finished structure. There is almost no end to the different loaves of bread you can make, an you’ll find that tiny changes, especially in hydration and type of flour, yield enormous differences in result. Such is the beauty of bread making.