

#RecipeUpTop (details to follow):
Ingredients:
- 350 grams bread flour;
- 350 grams water;
- 150 grams whole oat flour;
- 50 grams molasses (or honey, if preferred);
- 50 grams vegetable oil;
- 10 grams salt;
- 5 grams yeast;
- 1 egg (for wash) (optional);
- Loose whole oats (for topping) (optional);
Method: In a large mixing bowl, combine all ingredients until well-incorporated. Turn out the dough onto a heavily floured work surface and knead until the stickiness subsides. Return to bowl and let rise until doubled in size, approximately 2-3 hours. Shape into a loaf, and move to a loaf pan. Allow to proof until dough passes the finger-dent test. Brush with egg wash, top with oats, and score. Bake at 375F for one hour. Allow to cool completely before cutting.
The Details
This is a recipe I developed after tinkering around with my oat flour for a bit. Id been making all the bread for the house for some time, but found that it was mostly different varieties of white bread. The kids were starting to get a little older, and we were thinking a little more about getting some whole grains into them one way or another. I played around with whole wheat flour for a while, but was never particularly pleased with the results. As a bottom line, it seemed like kind of a cop-out: if youre going whole grain, then make it rustic. Make it coarse. Make it oat-y.
But, I also wanted it to still be bread, and not some crumbly goat-loaf.
And so, after a lot of experimenting and abject failure, I landed on this formula that provides a loaf thats easy to make, is 30% whole oat flour, and tastes fantastic.
Step one: Get everyone into the mixing bowl, and send it for a whirl to incorporate.
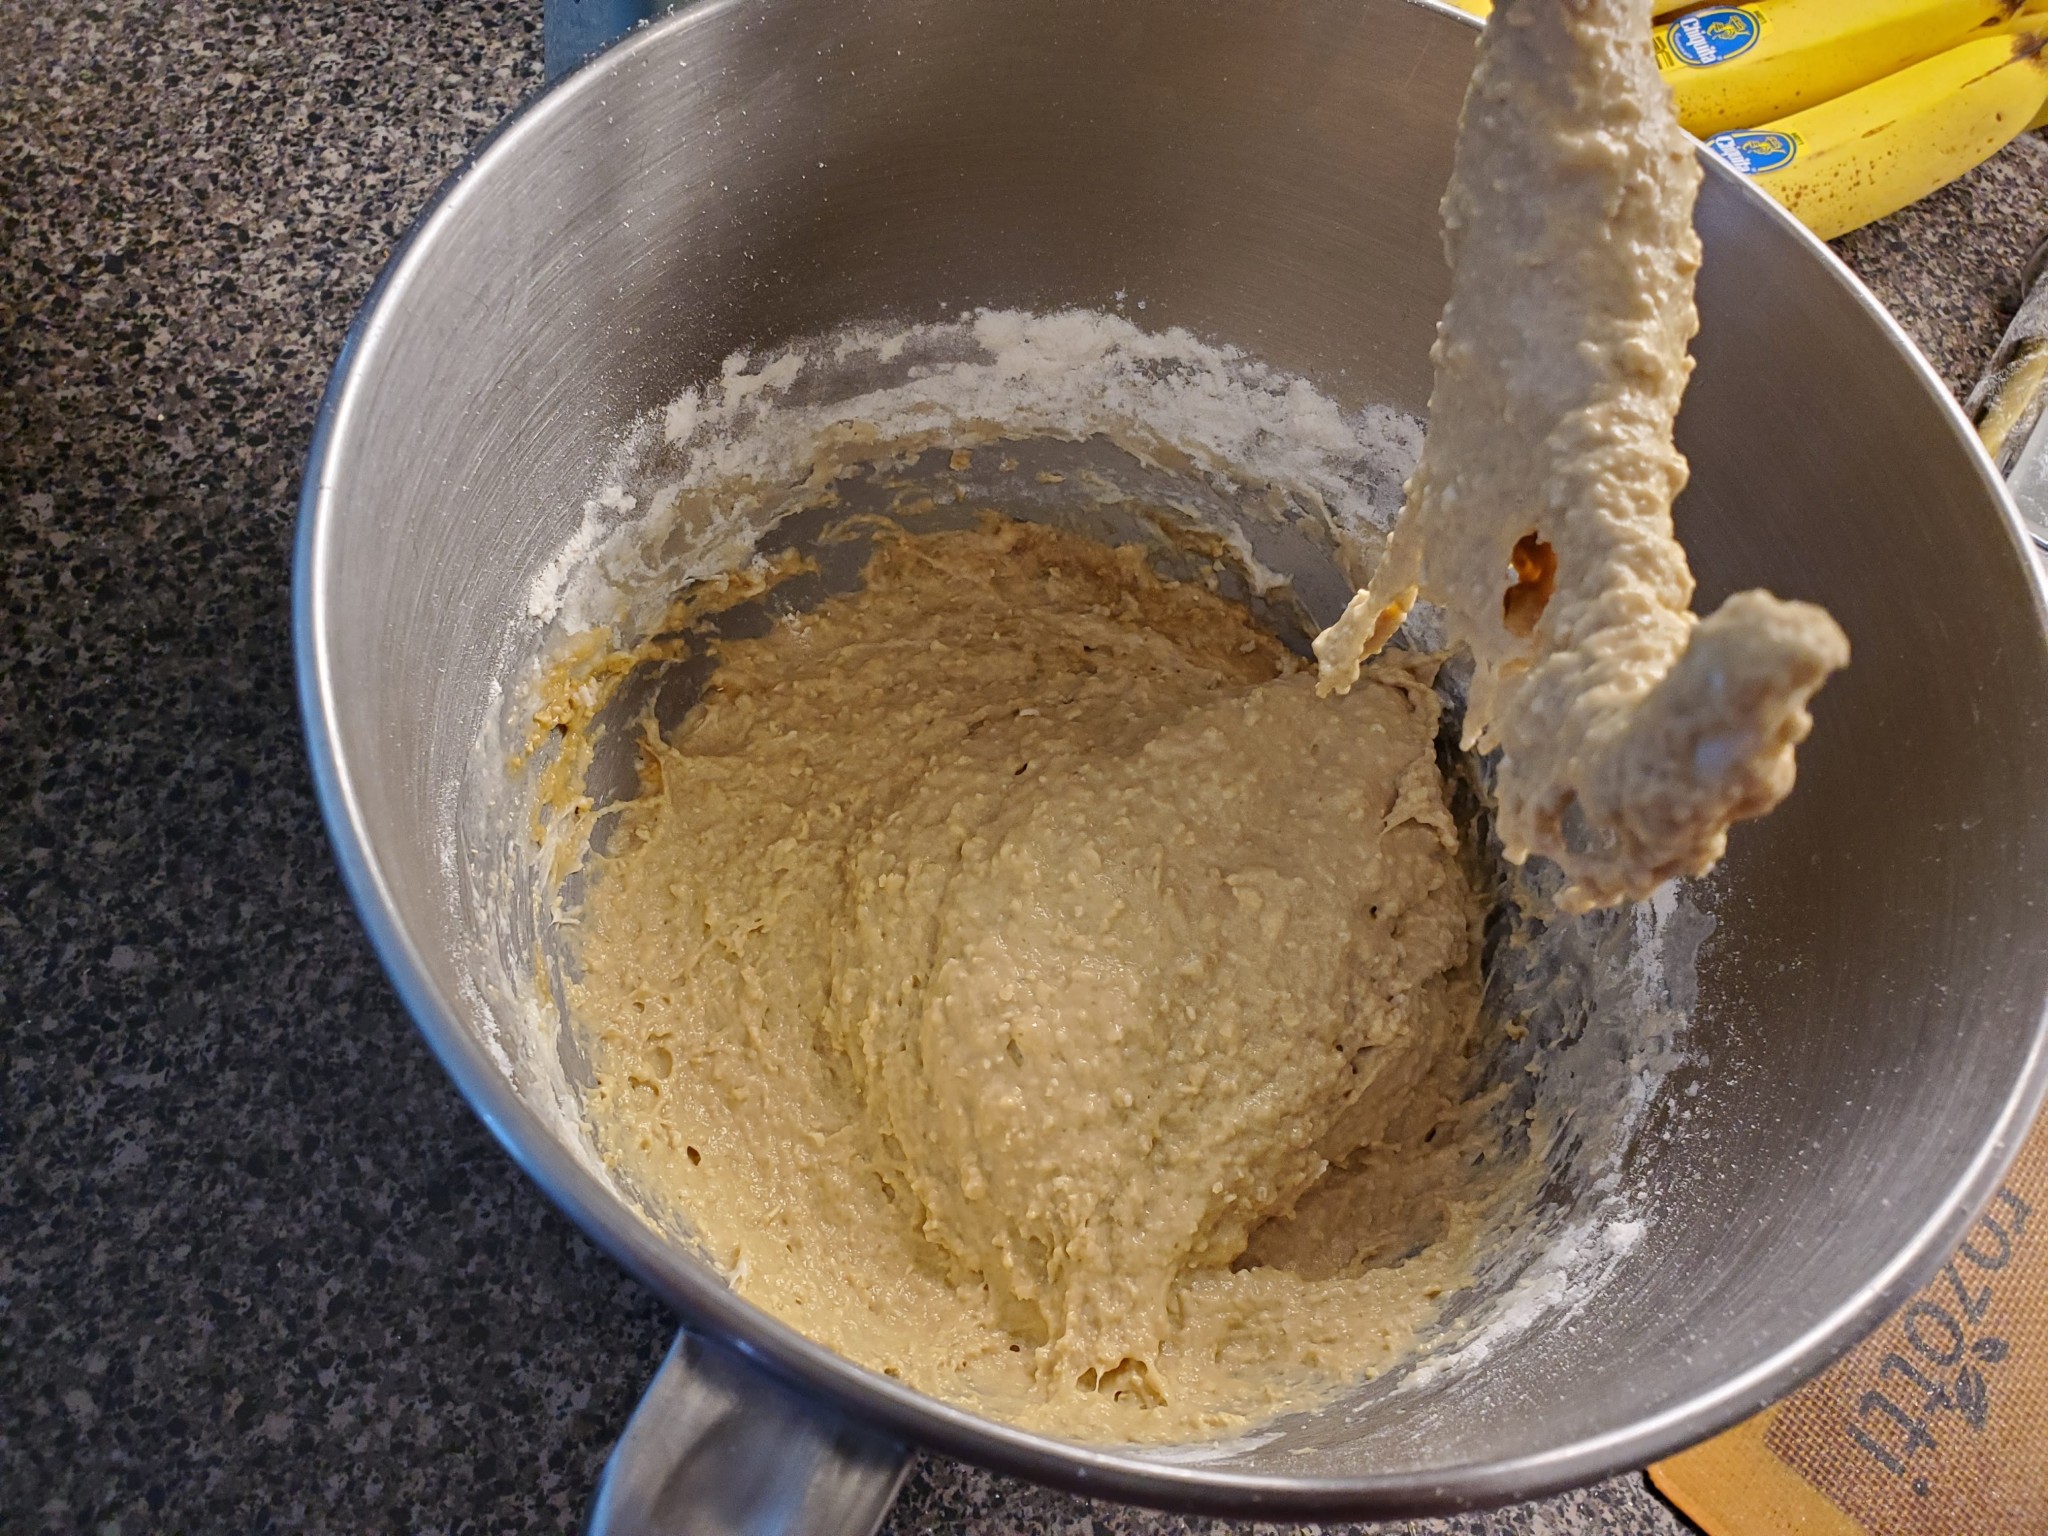
At this point, this is going to look more like batter than actual dough, but that will change. The primary reason, and the biggest hurdle I had to overcome when figuring this thing out, is hydration. My normal white sandwich bread is 60% hydration, meaning the water (by weight) is 60% of the flour weight. (In other words, if were using 1,000 grams of flour, the water would be 600 grams, or 60%). The oat flour, however, doesnt work exactly like wheat flour, particularly when it comes to playing with water. It sucks up more, and takes longer to do it. For that reason, the hydration in this recipe is cranked up to 70%, plus you have the oil and molasses to contend with.
The good news is that, while the dough is sticky in the bowl and will stick to your hands while youre moving it to a well-floured counter top, it will tighten up pretty quickly:

Keep the surface of the dough floured, and gently knead it until it feels like bread dough. Dont bother with the window-pane test here, because its not happening. Just use your senses until it starts to feel a little elastic, almost like pasta dough, then form it into a ball and get it back in a bowl to rise:

Cover it with a kitchen towel and let it rise somewhere warm until its doubled (roughly) in size, about 2 to 3 hours, depending.
Step two: shape into a loaf, and proof. What were doing here is allowing a second rise in the loaf pan that well actually be baking it in, which is absolutely crucial for texture. If it doesnt have time to properly proof, well end up with a dense bread-meteorite. The best way to tell if its proofed enough is the finger dent test which is exactly what it sounds like. Gently poke it with a finger, and see how fast the dent springs back. If its slow, and you can still see your print, its probably time to score and bake.
So, get your oven to 375F, and get your dough into a loaf-shape and in a loaf pan:
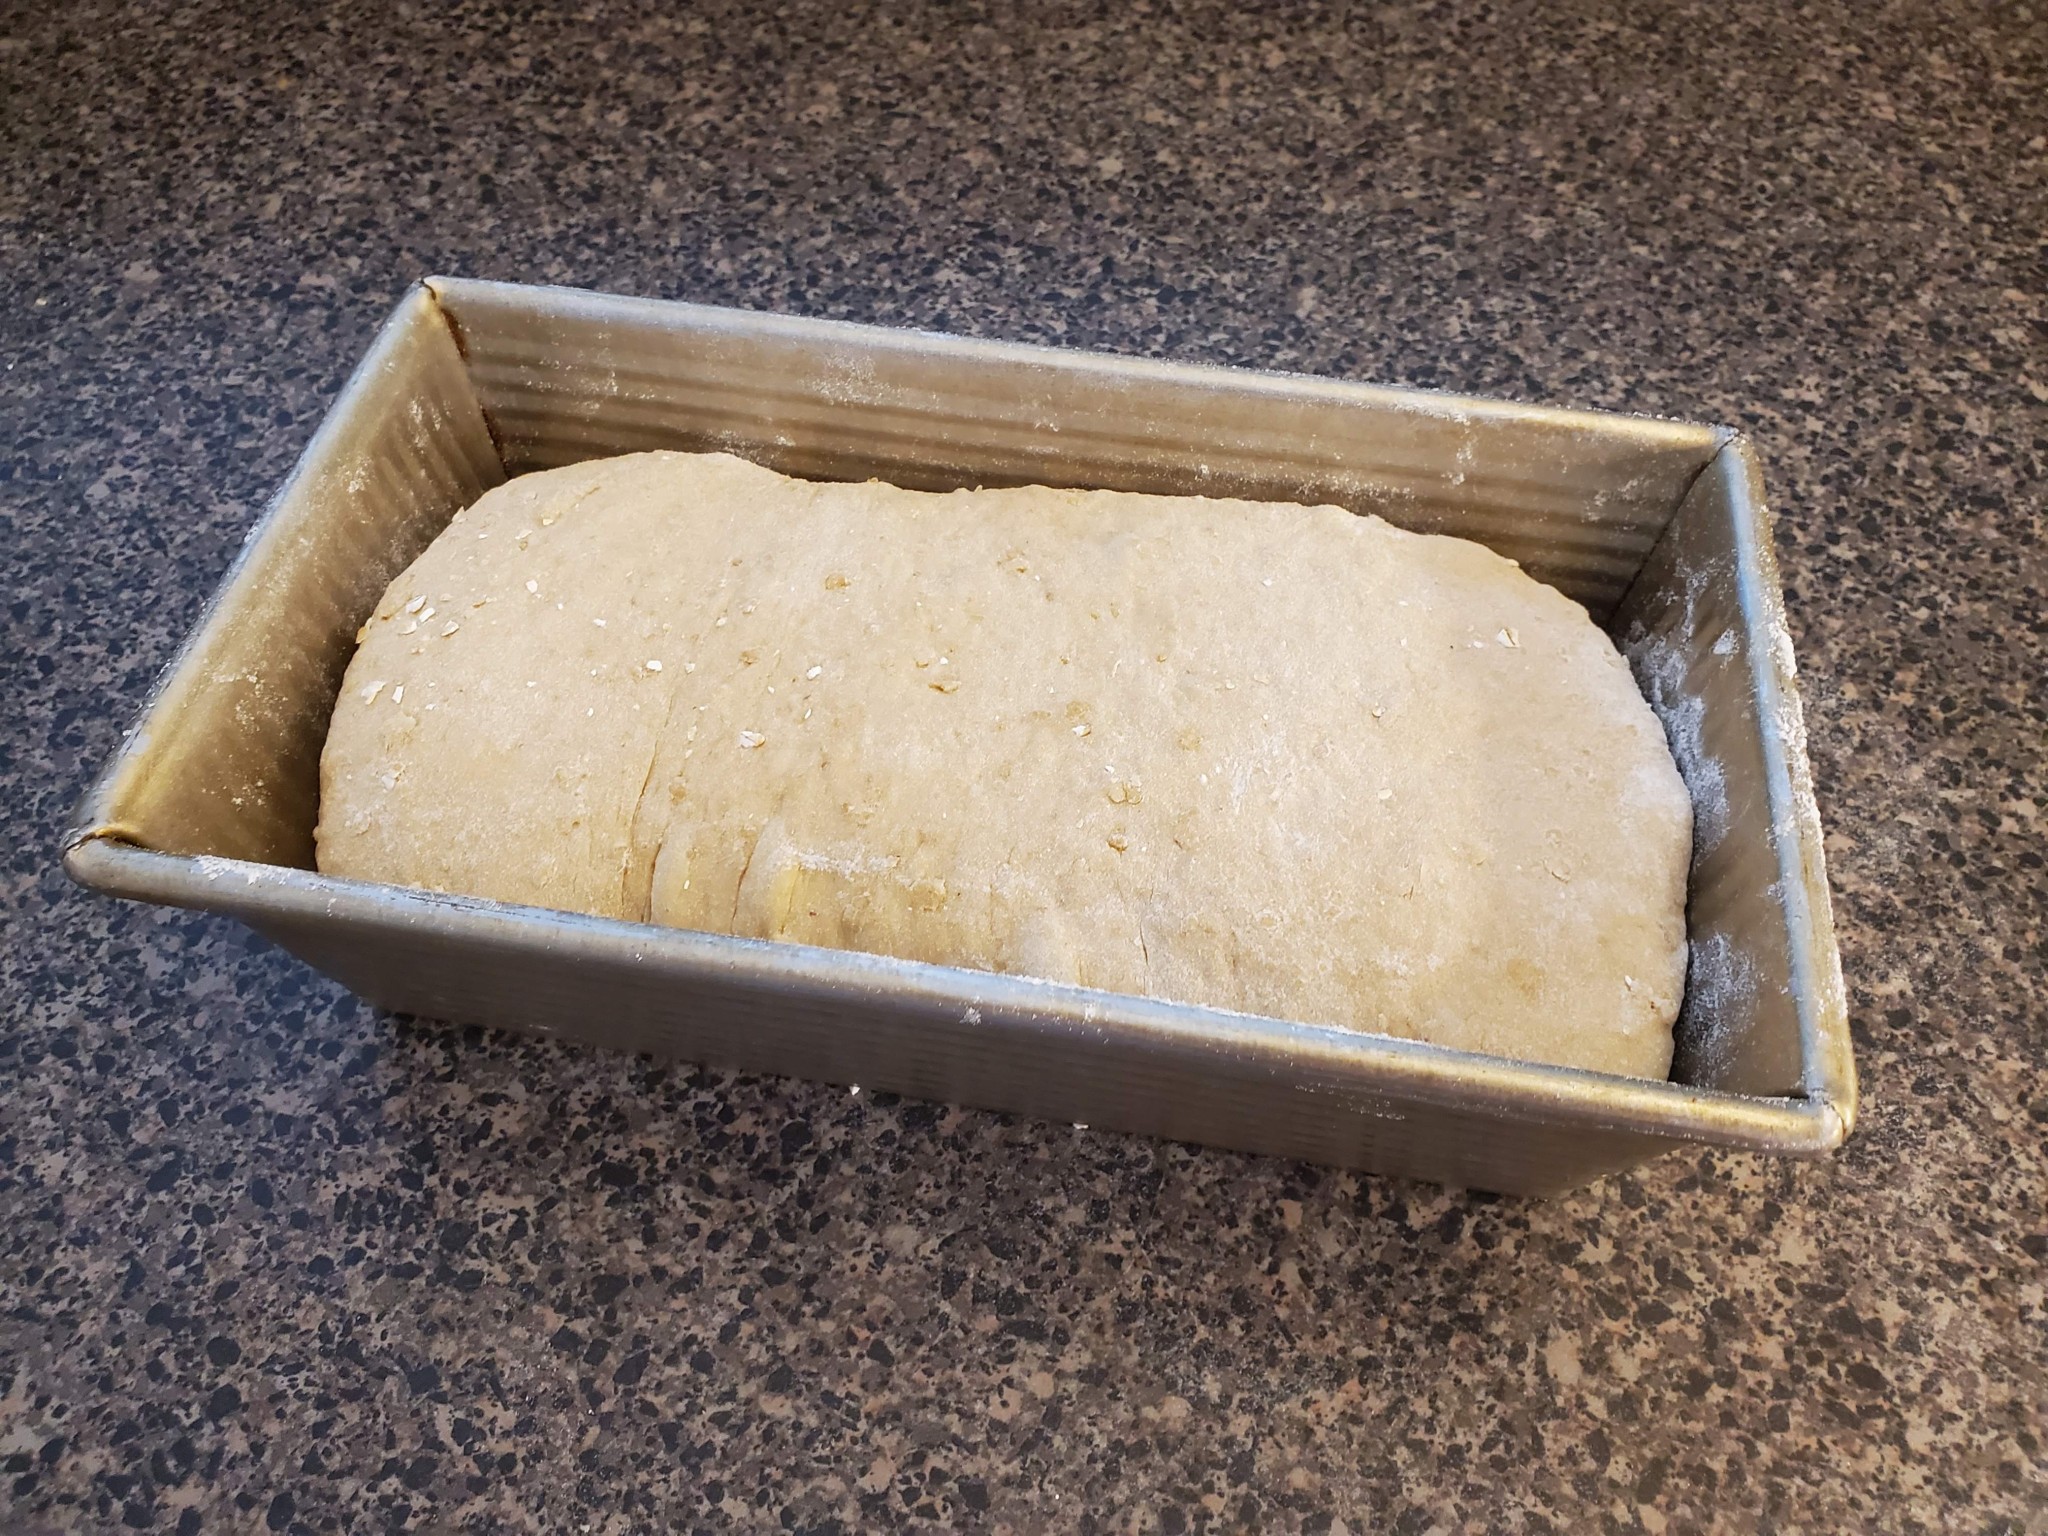
Then, cover it with a towel and let it proof until it passes that finger-dent test (about forty minutes):

Notice it doesnt look like it rose much. Well, part of that is my choice of camera angle, but part of it is, no, it didnt rise that much. But it did relax (and rose a bit). Due to the oat content in this bread it wont puff up like a classic white bread, and thats perfectly fine.
At this point, you can score and bake, or (if youre one for showmanship) you can egg wash the top, and sprinkle on some oats:

Step three: bake at 375F for an hour. Thats it, no spritzing, no special anything. Just put it in the oven and set a timer. At the end, youll get something like this:

Step four: move to a cooling rack, and get ready to play defense. This thing needs to cool COMPLETELY before you cut into it, or else that internal steam will escape and the interior crumb wont set correctly. The problem, of course, is this smells absolutely incredible, and people will materialize in the kitchen looking for a warm slice with some butter. Fend them off, and a fluffy, chewy reward is yours:

So, yes, this bread loves some butter and jam (homemade, but thats a post for the summer), but its shockingly great for grilled cheese, or french toast. The real surprise application turned out to be chicken salad with some fresh greens, but really its pretty fantastic for everything.
Just remember to to be on your guard:
